

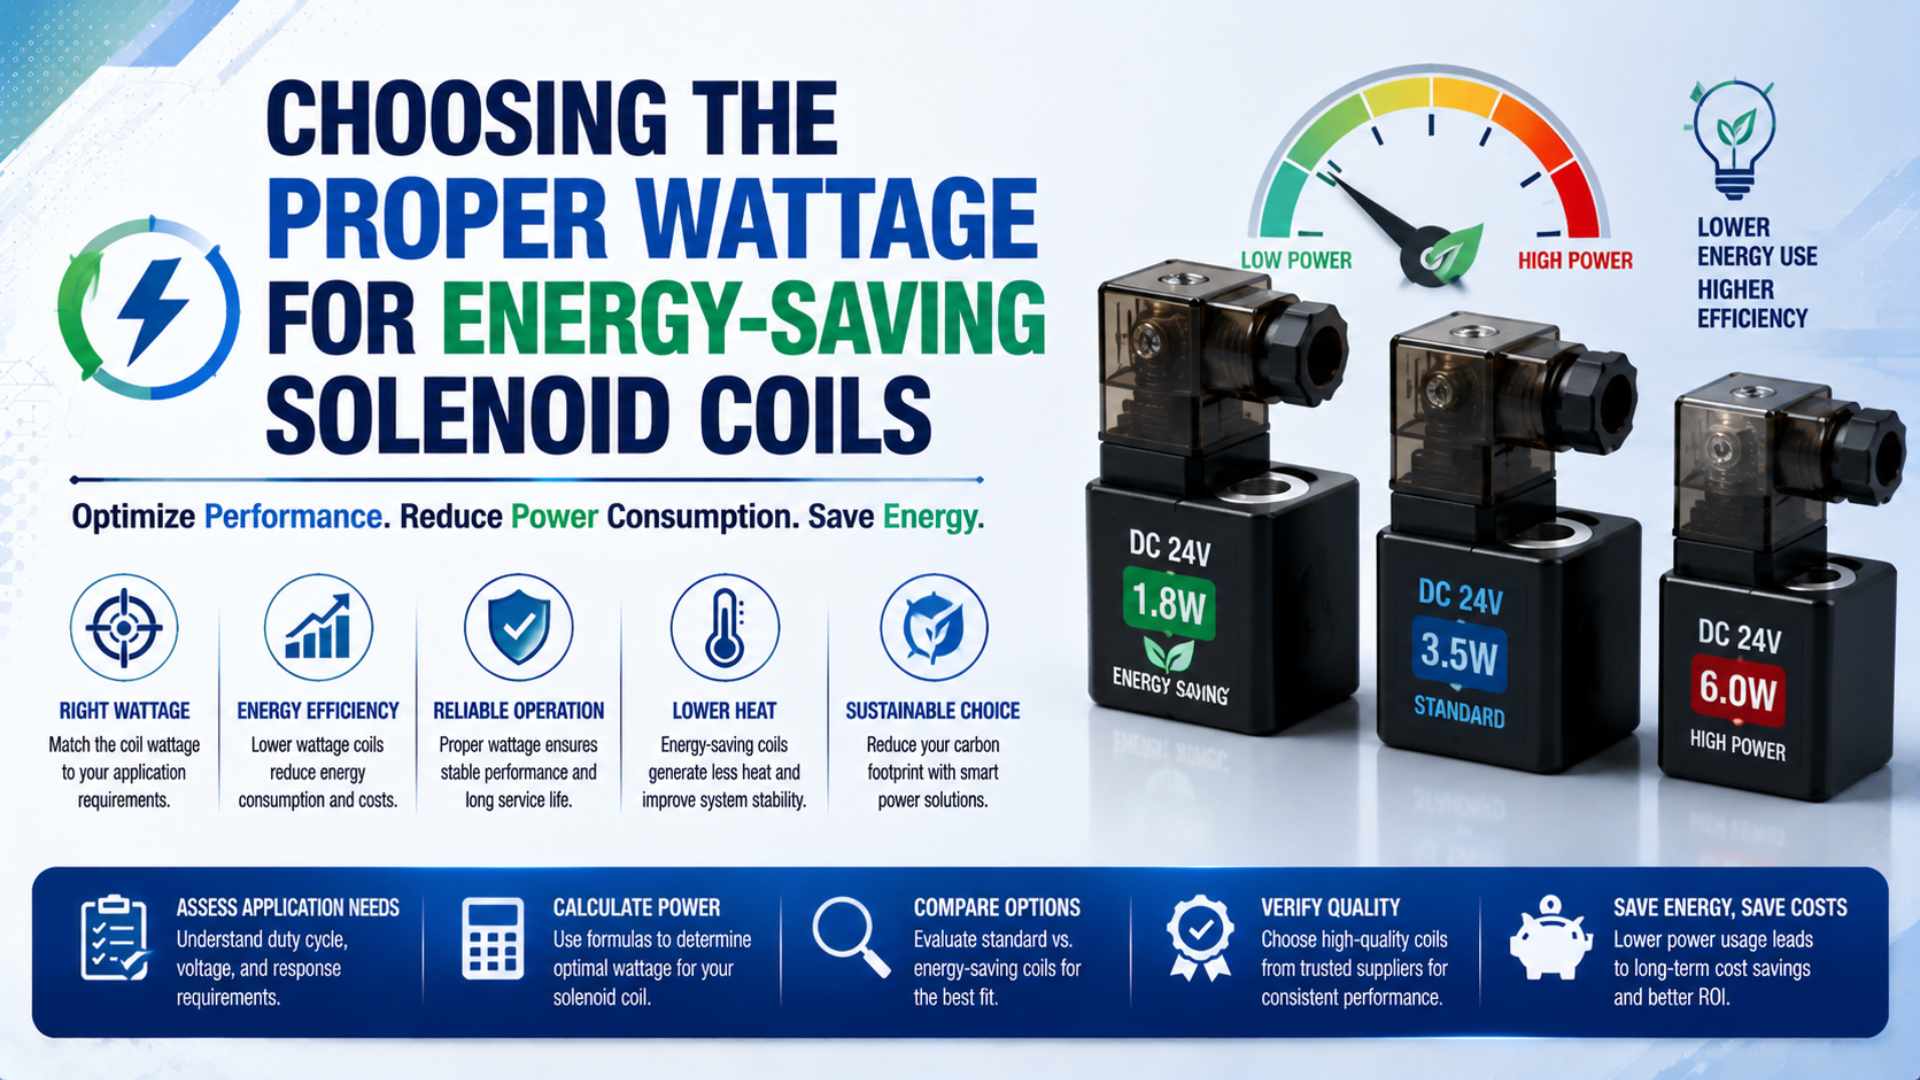
The proper wattage for an energy-saving solenoid coil is the wattage of an approved valve-and-coil configuration that will pull in, remain seated, release on time, and stay within electrical and thermal limits at the installed terminal voltage. It cannot be selected safely from port size, nominal voltage, or a watts-only comparison.
Start with the exact valve part number and operating envelope. Then verify the coil’s pull-in or peak current, holding current, allowed voltage range, duty rating, temperature limits, connector electronics, suppression, and response data. Finally, confirm that the PLC output and wiring can supply the peak without excessive voltage drop and validate the assembled circuit under worst-case conditions.
Key Takeaways
- Festo documents a VUVG option that reduces 24 VDC power from 1 W to 0.35 W, but that value belongs to a specific configuration.
- For a passive DC coil, lower terminal voltage reduces current and power; it does not increase current.
- Peak-and-hold drivers require separate peak current, keep time, hold current, and PWM settings.
- PLC point, group, module, and surge-current limits must all be checked.
- The final decision depends on an installed low-voltage, hot, cold, pressure, timing, and release test.
Rated coil wattage is the electrical input stated by the manufacturer under defined conditions. It is not a direct measurement of valve shifting force.
Peak-and-hold control applies a higher current long enough to move the armature, then reduces current after pull-in to limit holding power and heat. The peak, transition time, and hold level must match the valve and coil.
Why Is Wattage Alone Not Enough to Select a Solenoid Coil?
Festo’s May 2026 VUVG technical data lists 1 W for a 24 VDC configuration and 0.35 W with holding-current reduction. These values demonstrate a real energy-saving option, but they do not establish a universal wattage for every valve size or circuit (Festo VUVG technical data, 2026).
A coil’s electrical input is only one part of an electromechanical system. The valve maker has already coordinated the winding, pole geometry, air gap, armature mass, return spring, friction, pilot arrangement, pressure forces, seals, and permissible temperature rise. Two coils with the same voltage and wattage may not produce the same current waveform, magnetic force, stroke, or release behavior.
For the same reason, the idealized statement that magnetic force rises with current squared and falls with air-gap squared is not a selection equation. Real solenoids include leakage flux, fringing, magnetic saturation, nonuniform gaps, eddy-current effects, and geometry-specific force curves. Use manufacturer force-current or response data when supplied. Otherwise, use the approved valve-coil combination and test it.
The load opposing pull-in can include:
- return-spring force and armature inertia
- seal and bearing breakaway friction
- pressure and flow forces specific to the valve architecture
- pilot-pressure requirements on pilot-operated valves
- contamination, lubricant condition, vibration, and cold-temperature effects
- residual magnetism and mechanical tolerances that influence release
Port size is therefore not a wattage lookup key. A compact pilot-operated valve can use less coil power than a smaller direct-acting valve because the solenoid moves a pilot element rather than the main flow-sealing element. Read the spool-versus-poppet flow-path guide before comparing unlike valve constructions.
The correct specification object is not “a 24 VDC, 2 W coil.” It is “this coil, on this valve operator, with this connector or driver, supplied by this output circuit, across this voltage and temperature envelope.” Wattage can screen candidates, but only the complete configuration can be approved.
How Do Fixed-Power and Peak-and-Hold Coils Behave?
Texas Instruments’ DRV110 exposes four independent control quantities: peak current, keep time, hold current, and PWM frequency. That separation explains why a peak-and-hold coil cannot be represented accurately by one steady wattage value (Texas Instruments DRV110; DRV110 datasheet).
A passive DC coil connected directly to a voltage output draws current according to its resistance and inductance. Current rises toward a steady value after energization. The electrical power then becomes heat in the winding, subject to heat transfer into the operator, valve body, connector, surrounding air, and mounting structure.
A peak-and-hold controller instead regulates the current waveform. It supplies a defined peak to move the armature, waits for a defined keep interval, and then reduces current to a holding level. The lower holding level can reduce steady heat, but only after successful pull-in. If peak current is too low or keep time is too short, the armature may stall. If hold current is too low, vibration, pressure, temperature, or contamination may allow dropout.
Some energy-saving coils integrate the electronics in the connector or operator. Others expect an external driver. Do not add external PWM to an ordinary coil merely because lower average power appears possible. The winding, flyback network, output transistor, connector LED, diagnostic circuit, electromagnetic-compatibility behavior, and release-time requirement must all support that method. The PWM control guide explains the control principle in more depth.
Which Electrical Calculations Belong in the Selection?
ABB uses a copper resistance temperature coefficient of approximately 0.0039 per kelvin in its winding-resistance calculation. That matters because a hot copper winding has more resistance than a cold one, so a passive voltage-driven DC coil draws less steady current as it heats (ABB application note).
For a passive DC coil at steady state:
Here, is coil current, is the voltage measured at the energized coil terminals, is winding resistance at temperature , and is winding input power. These relationships apply to a passive DC winding after the inductive transient. They do not describe a current-regulated peak-and-hold driver.
Estimate hot winding resistance from a documented reference measurement:
Here, is resistance at reference temperature , is resistance at temperature , and is the temperature coefficient appropriate to the conductor and reference convention. Use the coil manufacturer’s data when available.
The voltage that matters is not the power-supply nameplate. It is the voltage at the coil:
Here, is loaded supply voltage, is the PLC or driver on-state drop, and includes the outgoing and return conductors, terminals, connectors, and contacts. Measure these values during the peak-current interval, not only with the valve disconnected.
Correcting a common low-voltage error
Consider a hypothetical passive 24 VDC coil rated 11 W at a 20°C reference. Its calculated reference resistance is:
If the estimated winding temperature is 80°C and is 0.00393 per kelvin, the estimated hot resistance is about 64.7 Ω. At 19.5 V on the coil terminals:
The lower terminal voltage does not increase current to 0.524 A. That incorrect result comes from treating the 11 W rating as constant and dividing it by 21 V or 19.5 V. A passive resistor does not maintain constant power. Also, 19.5 V is only 81.25% of 24 V, so it must be compared with the exact valve-coil voltage tolerance rather than described as automatically acceptable.
This calculation still does not prove the valve will shift. It estimates electrical conditions. Magnetic performance, pressure capability, response, and temperature rise remain configuration-specific test or catalog questions. Use the separate solenoid voltage-tolerance guide to build the supply envelope, and see how coil inductance affects solenoid response for the related transient behavior.
How Should PLC Output Capacity and Simultaneous Inrush Be Checked?
One Siemens ET 200SP digital-output module is specified as eight 24 VDC outputs at 0.5 A, while its manual also defines module, short-circuit, load, and diagnostic conditions. This illustrates why “24 VDC output” is not enough information for coil approval (Siemens ET 200SP manual).
Check every applicable limit:
- continuous current per output point
- peak or surge current per point and its permitted duration
- total current per group, common, connector, and module
- ambient-temperature derating and mounting-orientation limits
- output on-state voltage drop at the required current
- off-state leakage current and residual voltage
- short-circuit, overload, open-load, and wire-break diagnostics
- switching frequency, inductive-load rating, and external suppression rules
For a group of valves commanded together, calculate the worst credible peak:
Here, is the simultaneous group current, is the peak current of valve , and is the number of coils that can overlap. Add other loads on the same supply branch, then evaluate the supply, fuse, output module, connector, and common-return path.
Do not assume software staggering eliminates the electrical peak. Emergency recovery, startup initialization, recipe changes, communication restoration, or simultaneous interlocks may command several outputs together. If staggering is a control requirement, document the guaranteed delay and test abnormal restart states.
Measure loaded supply voltage at the module and at the furthest coil while the maximum credible group is energized. A bench test with one short cable can miss a common-return drop that affects an entire manifold. Oscilloscope or high-speed logger traces are preferable when a short peak or driver transition is involved.
The most revealing voltage measurement uses two synchronized channels: one at the output-module supply and one at the coil terminals. The difference separates supply sag from output, connector, and cable losses. A single multimeter reading at the cabinet can show “24 V” while the remote coil receives materially less during pull-in.
How Do Temperature, Duty, Pressure, and Response Time Change the Decision?
ISO 12238:2023 specifies test procedures for the shifting time of electrically or pneumatically operated two- and three-position directional valves. It provides a measurement framework, not a universal response time or wattage allowance (ISO 12238:2023).
Temperature changes both the winding and the valve. Hot copper resistance rises, which lowers passive-coil current at a fixed voltage. Meanwhile, hot or cold seals, lubricant viscosity, dimensional changes, pilot flow, and electronics can change mechanical behavior. Ambient temperature, medium temperature, enclosure temperature, adjacent-valve heating, mounting, airflow, and energized duty should therefore be taken from the exact datasheet and reproduced in validation where practical.
Pressure also acts through the real valve architecture. A direct-acting operator must move the sealing element against the applicable pressure forces. A pilot-operated valve must first actuate its pilot stage and still receive enough pilot pressure and flow to shift the main stage. Selecting higher wattage cannot compensate for operation outside the specified pressure range.
Duty deserves more than a “continuous” label. Record:
- maximum continuous energized time
- switching frequency and minimum off time
- number of adjacent energized coils
- startup and abnormal-state command patterns
- cabinet, manifold, and media temperatures
- required pull-in and release times at each tested condition
Measure response from a clearly defined electrical event to a clearly defined pneumatic event. Coil-current rise, armature movement, spool shift, port-pressure change, tubing fill, and actuator motion are different delays. The valve response-time measurement guide shows how to keep those boundaries separate.
How Should Suppression and Polarity Be Matched?
SMC’s current S070 instructions list diode or varistor protection depending on the voltage and connector configuration, and identify polarity for applicable DC versions. This is another reason to select by complete part number rather than by voltage and watts alone (SMC S070 instructions).
An inductive coil generates a voltage transient when current is interrupted. Suppression protects the switching device, but the clamp method changes how quickly current decays. A simple flyback diode usually produces a lower clamp voltage and slower current decay than a higher-voltage TVS or other approved network. Slower current decay can delay armature and spool release.
Check these interfaces together:
- coil polarity, connector pinout, LED, rectifier, and suppression
- PLC transistor type and permitted inductive load
- built-in versus external clamp location
- maximum output voltage and transient-energy rating
- required release time and safe de-energized state
- residual leakage current and diagnostic compatibility
Do not add a generic capacitor across the coil as a cure for voltage drop. It may increase output surge current, slow release, mask diagnostics, or exceed the output’s capacitive-load limit. Do not place a second suppression device across a connector that already contains one unless both manufacturers approve the combination.
Safety is a system property. ISO 13849-1:2023 describes a methodology for designing safety-related parts of control systems; it does not make a coil safety-rated merely because its wattage is low or its connector has suppression (ISO 13849-1:2023). The circuit architecture, diagnostics, fault response, valve behavior, and validation must support the required safety function.
A Practical Solenoid Coil Wattage Selection Workflow
SMC’s current S070 instructions specify a rated-voltage tolerance of ±10% for the documented family, while its 0.1 W holding option is restricted to particular 24 VDC plug-lead configurations. Those boundaries show why a selection workflow must end at an exact order code, not a generic low-power category (SMC S070 instructions).
- Define the valve duty. Record function, normal state, ports, flow requirement, pressure range, pilot conditions, medium, switching frequency, energized time, and required pull-in and release timing.
- Select the valve architecture first. Confirm the exact valve or manifold station can meet the pneumatic and environmental requirements.
- List approved coil options. For each exact coil and connector, collect nominal voltage, allowed voltage range, peak or inrush current, keep time, hold current or power, duty, temperature limits, insulation, protection, polarity, and response data.
- Calculate the installed electrical envelope. Include loaded supply tolerance, output drop, hot and cold wiring resistance, terminals, connectors, and common returns. Separate passive-coil calculations from regulated-driver behavior.
- Check the control hardware. Verify point, group, module, connector, common, fuse, and power-supply limits for continuous and simultaneous peak current.
- Match suppression and diagnostics. Confirm clamp type, polarity, release-time effect, residual current, and the behavior of open-load or wire-break diagnostics.
- Validate the assembled circuit. Test the exact valve, coil, connector, cable, output, supply, pressure, temperature, duty, and software command pattern before release.
This workflow also prevents overlap with two different decisions. Use the magnetic plunger-force calculation guide when designing an electromagnetic actuator rather than selecting a catalog valve. Use the low-power solenoid valve business guide when the exact compatible configuration is already known and the remaining question is plant-level energy or payback.
How Should the Selected Coil Be Validated?
The SMC S070 instructions require operation within stated voltage, pressure, temperature, vibration, and impact conditions, while ISO 12238:2023 defines a repeatable shifting-time test boundary. Together, they support validation of the installed configuration rather than acceptance from a room-temperature bench click (SMC S070 instructions; ISO 12238:2023).
Use production-equivalent hardware and record the firmware or logic version. At minimum, test:
| Test condition | What to apply | What to record |
|---|---|---|
| Minimum terminal voltage | Lowest credible loaded supply, maximum cable drop, hot winding | Coil voltage and current waveform, pull-in success, shift time |
| Cold start | Minimum specified ambient and medium condition | First-cycle pull-in, pilot behavior, timing, repeatability |
| Hot steady state | Maximum duty, adjacent energized coils, maximum ambient and media temperature | Coil or operator temperature, hold stability, current, timing |
| Pressure limits | Minimum pilot pressure and maximum operating pressure as applicable | Complete spool shift, port pressure trace, leakage, timing |
| Simultaneous command | Maximum credible overlapping outputs and restart sequence | Supply and common-return sag, module status, diagnostics |
| De-energization | Approved suppression and worst-case hot condition | Current decay, armature or pressure release time, safe state |
| Endurance sample | Representative switching and energized duty | Drift in current, temperature, timing, leakage, and fault history |
Measure the coil-terminal voltage and current waveform on the same timebase as the command and a valve-state indicator, such as port pressure or a validated spool-position signal. A sound or visible LED is not proof that the spool reached its required position.
Set acceptance criteria before testing. Use the manufacturer’s ratings, machine timing budget, required safe state, and control-hardware limits. Do not invent a generic 1.5 or 2.0 safety factor and assume it covers temperature, contamination, cable loss, and pressure simultaneously. Each uncertainty has a different physical effect.
Record the complete approved configuration:
- valve, manifold, coil, connector, seal, and voltage order codes
- power supply, output module, channel, fuse, and wiring details
- suppression and polarity
- peak current, keep time, hold current, and PWM settings when applicable
- software staggering or restart rules
- test conditions, instruments, raw traces, results, and approval revision
If any of those items changes, perform an impact review. A connector substitution can alter suppression, polarity, diagnostics, and release time even when the printed wattage is unchanged.
Selection Rule
Festo’s 1 W-to-0.35 W option and SMC’s 0.35 W-to-0.1 W peak-and-hold example prove that meaningful holding-power reduction is available in specific product configurations. Neither value is a generic target for another valve family (Festo VUVG technical data; SMC S070 instructions).
Choose the lowest-power approved coil configuration that passes the real pneumatic duty, terminal-voltage, current-capacity, temperature, timing, suppression, diagnostic, and release checks. Do not choose the lowest wattage in a table and then try to make the valve fit.
For a new machine, ask the valve supplier for the exact current waveform, voltage tolerance, response test conditions, thermal limits, suppression circuit, and compatible output requirements. Bepto Pneumatic can help cross-check these items against the valve and manifold configuration before samples are ordered.
Frequently Asked Questions
Texas Instruments separates four peak-and-hold driver settings, while ISO 13849-1:2023 treats safety as a control-system design problem. The five questions below apply those boundaries to common specification traps (Texas Instruments DRV110; ISO 13849-1:2023).
Can coil wattage alone show whether a solenoid valve is compatible?
No. Wattage does not identify the valve operator geometry, pressure forces, pilot arrangement, winding temperature, current waveform, connector electronics, suppression, or response. Select an approved coil for the exact valve and voltage, then verify the installed electrical and pneumatic operating envelope.
Why does lower voltage not increase current in a passive DC coil?
At steady state, a passive DC coil follows . If resistance is unchanged, lowering terminal voltage lowers current and power. A hot copper winding has higher resistance, which lowers current further. Constant-current or peak-and-hold electronics behave differently and must be analyzed from their control settings and datasheet.
Can I add PWM to a standard solenoid coil to reduce holding power?
Only when the coil, valve, driver, output hardware, suppression, diagnostics, and electromagnetic-compatibility requirements all permit it. Peak current, keep time, hold current, and PWM frequency must be validated. Unapproved PWM can cause incomplete pull-in, dropout, excess driver stress, noise, heat, or delayed release.
Does low holding wattage make a valve suitable for a safety function?
No. Low wattage is an energy and thermal characteristic, not a safety category or performance level. A safety function depends on the control architecture, valve behavior, diagnostics, fault response, common-cause controls, and validation required by the machine risk assessment and applicable standards.
Which conditions should be tested before approving the coil?
Test the exact installed configuration at minimum loaded terminal voltage, cold start, maximum duty and temperature, applicable pressure limits, maximum simultaneous output load, abnormal restart, and de-energization. Record current, coil voltage, temperature, valve-state timing, diagnostics, leakage, and safe-state behavior against predefined acceptance criteria.
Sources
- Festo VUVG technical data, edition 2026-05.
- SMC S070 safety and maintenance instructions, retrieved 2026-07-26.
- Texas Instruments DRV110 product page and datasheet.
- ISO 12238:2023, pneumatic directional-control valve shifting-time tests.
- ISO 13849-1:2023, safety-related parts of control systems.
- Siemens ET 200SP digital-output module manual.
- ABB winding-resistance temperature correction note.