

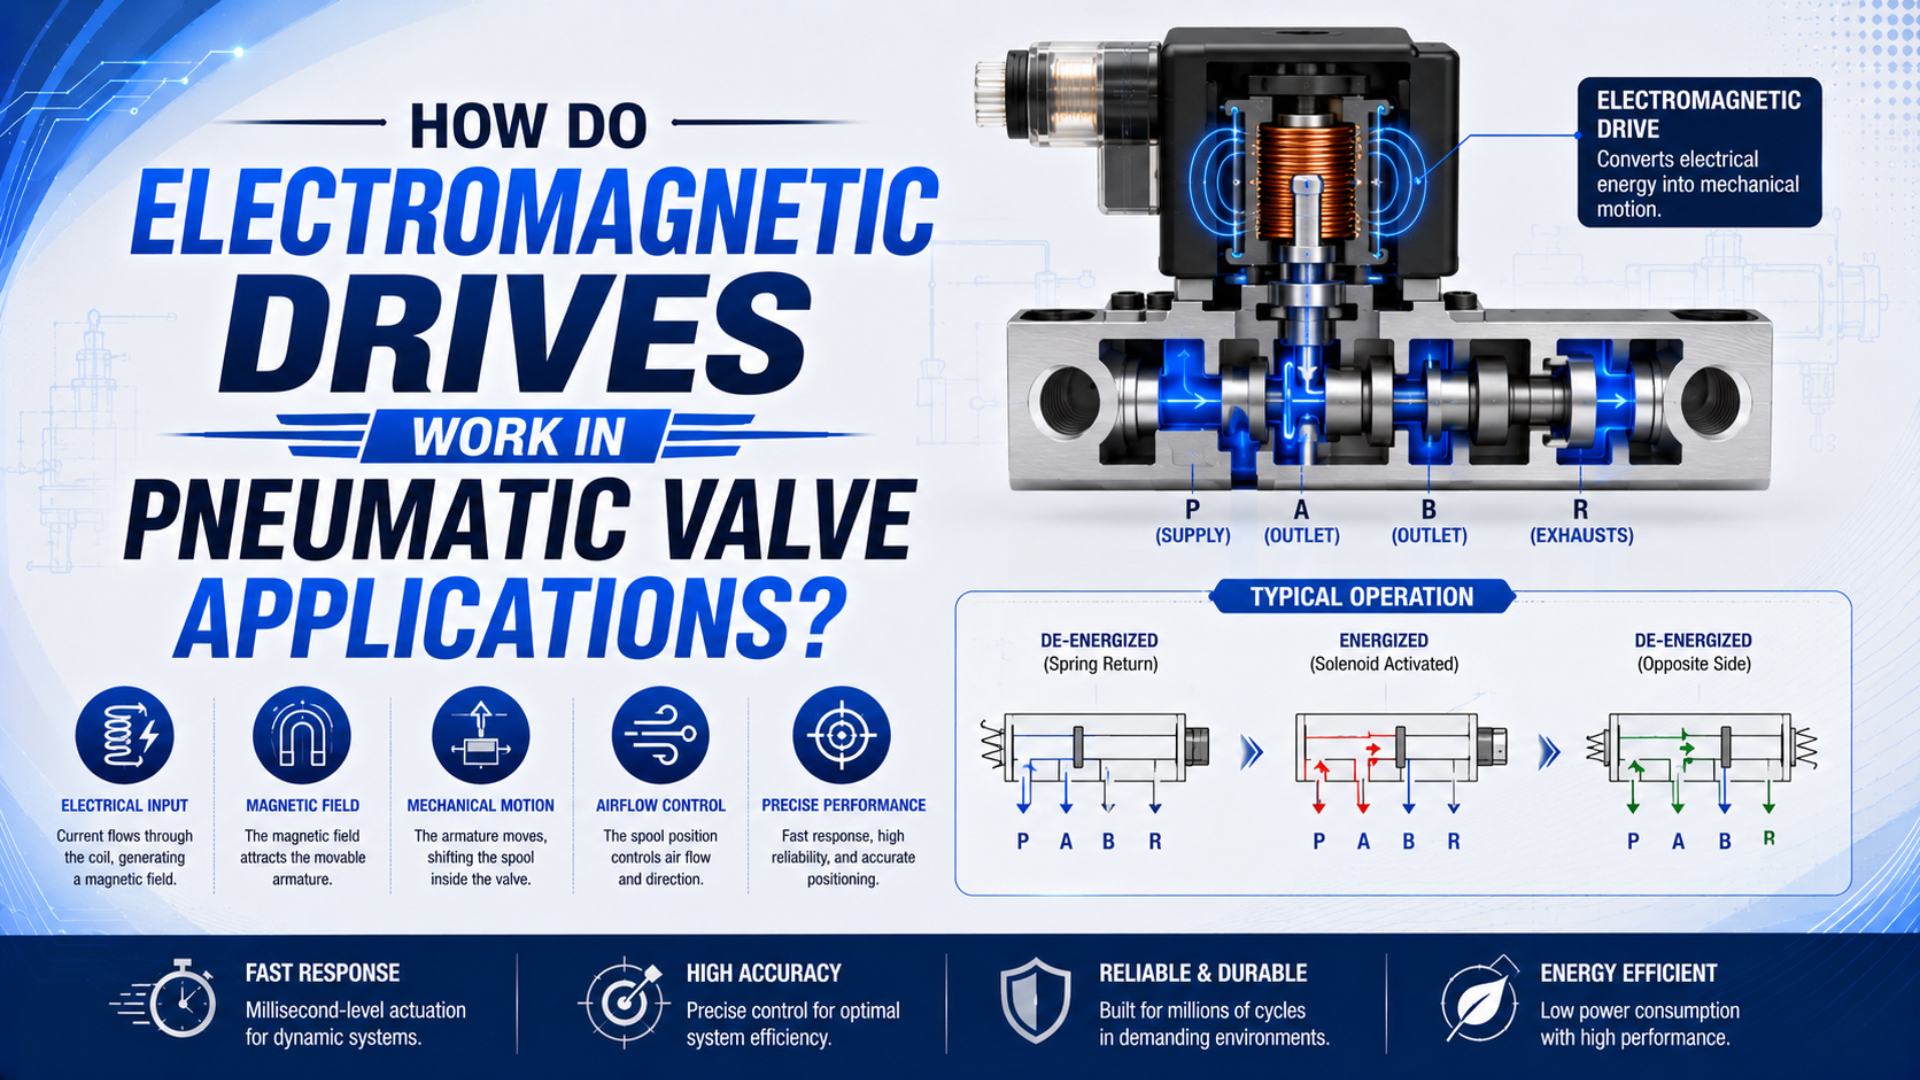
An electromagnetic drive is the actuator that switches a pneumatic valve by converting an electrical command into coil current, magnetic attraction, and plunger motion. That motion either opens a small pilot passage or moves the valve element directly. The resulting pressure imbalance or mechanical displacement then changes the compressed-air flow path.
Electromagnetic drives in pneumatic valves are therefore part of one dynamic electrical, mechanical, and fluid-power system. Correct voltage at a disconnected cable does not prove that the coil develops enough current, the plunger completes its stroke, the pilot stage receives adequate pressure, or the main spool finishes shifting. A useful diagnosis follows the entire chain.
Key Takeaways
- A coil does not move a valve merely because nominal voltage is present. Current rise, coil resistance, inductance, air gap, return force, pressure differential, and friction all affect whether the armature reaches its seated position.
- Pull-in and holding are different operating states. A peak-and-hold driver can provide high initial current, then reduce current after actuation; TI’s DRV110 is one documented implementation of that control method.
- The turn-off circuit affects release. A simple flyback diode protects the switch but slows current decay, while a higher-voltage clamp can release stored magnetic energy faster within the driver’s voltage limits.
What Does an Electromagnetic Drive Do Inside a Pneumatic Valve?
ASCO defines a solenoid as the electromagnetic part made from the coil, core tube, moving core, and enclosure. In a valve, those parts create motion; they do not by themselves define the port function or the pneumatic operating range (ASCO Solenoid Valve Engineering Information).
When the control output energizes the coil, current creates magnetic flux in the ferromagnetic circuit. The magnetic field attracts the movable armature or plunger toward the fixed pole. A return spring, fluid pressure, seals, and friction oppose that movement. The drive succeeds only if the available force remains sufficient through the required stroke.
What happens next depends on the valve architecture:
| Architecture | Electromagnetic action | Pneumatic result | Main selection boundary |
|---|---|---|---|
| Direct acting | Plunger opens or closes the main seat | Flow changes without a separate pilot stage | Coil force must overcome the seat load, spring, friction, and pressure force. |
| Solenoid pilot operated | Plunger switches a small pilot passage | Pilot pressure moves the main spool, diaphragm, or poppet | Both the electrical drive and minimum pilot conditions must be satisfied. |
| Air piloted with separate pilot valve | Solenoid belongs to another small valve | The external pilot signal shifts the main valve | Treat the signal valve and main valve as two specified components. |
| Proportional solenoid | Controlled current produces a regulated position or force | Valve opening varies rather than switching only on or off | Use the manufacturer’s current, stroke, hysteresis, and controller data. |
| Latching solenoid | A pulse changes state and a magnetic or mechanical latch holds it | Continuous coil power may not be required | Pulse polarity, duration, stored state, and safe restart behavior are model specific. |
This distinction is fundamental. A direct-acting valve may work at zero pressure differential, whereas an internally piloted valve may require minimum inlet pressure. See the detailed comparison of direct-acting and pilot-operated solenoid valves before treating an electrical symptom as a coil problem.
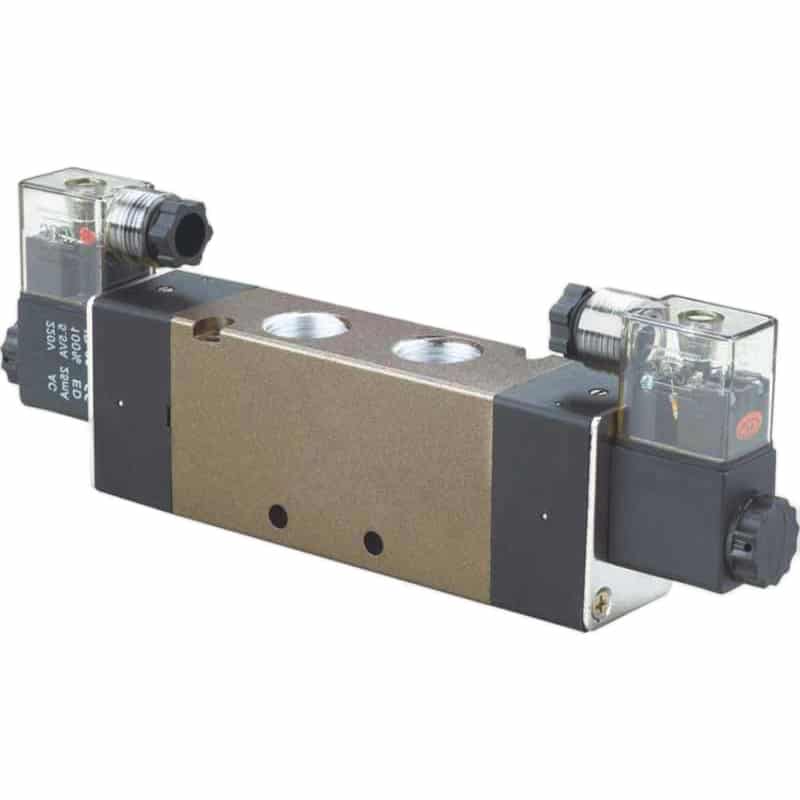
The same valve family can use solenoid or air-pilot operators. The operator type, spool function, pressure range, voltage, and connector options must match the exact order code.
The most useful boundary is the pilot interface: the solenoid creates a small controlled motion, while compressed air may provide most of the force that shifts the main stage. Ignoring that boundary leads to needless coil replacement when the actual fault is low pilot pressure, a blocked pilot exhaust, or a contaminated spool.
The Electrical-to-Pneumatic Drive Chain
TI’s DRV110 driver separates solenoid operation into a peak-current interval and a lower holding-current interval. SMC’s SY3000/5000 series likewise lists different power figures for standard and power-saving circuits. These product examples show why a coil label alone does not describe the complete electromagnetic drive (TI DRV110 Datasheet; SMC SY3000/5000).
The chain has five practical checkpoints:
- Command: A PLC output, relay, transistor, or valve-manifold electronics requests a state change.
- Current: Supply voltage, cable resistance, coil resistance, driver topology, and suppression components determine the current waveform.
- Magnetic conversion: Coil turns, current, air gap, pole geometry, material properties, and saturation determine the available force.
- Mechanical movement: The plunger must overcome the spring, pressure forces, friction, and contamination through its full stroke.
- Pneumatic switching: The opened pilot path or moved seat must create enough flow and pressure differential for the valve’s specified function.
The steady-state indicator LED proves only part of checkpoint one. For example, it may light through a high-resistance connection that cannot deliver rated coil current. Conversely, normal current with no main flow can indicate a jammed armature, missing pilot pressure, blocked exhaust, incorrectly assembled manual override, or stuck spool.
For the broader port and spool sequence after the electromagnetic operator moves, use the guide to how pneumatic solenoid valves control compressed-air flow.
How Does Current Build in a DC Solenoid Coil?
The DRV110 datasheet notes that initial current rise depends on the solenoid’s inductance and resistance. It then regulates a defined peak current before reducing to a holding current. For instance, a multimeter’s average voltage cannot reveal the complete current waveform of a PWM-controlled coil (TI DRV110 Datasheet).
For a DC solenoid whose inductance can change with plunger position, the terminal relationship can be written as:
Here, is coil resistance at temperature , and is inductance at plunger position . If position is effectively fixed during the interval, the inductive term reduces to . Those dependencies matter: copper resistance rises as the coil heats, while inductance can change substantially as the air gap closes.
If a constant voltage is applied and and are approximated as constant, current rises toward :
This expression is a circuit approximation, not a full valve-response model. The plunger may begin moving before current reaches its final value. Movement then changes inductance and load force. In addition, a pilot-operated valve adds pilot-volume filling, pressure buildup, and main-spool travel after the electrical event.
For a narrower treatment of timing, pickup threshold, and current decay, see how coil inductance affects solenoid response time. This article keeps the wider boundary: driver, magnetic operator, pilot stage, main valve, and air path.
Coil heating is also current dependent. The resistive loss at a given instant is . However, catalog “power consumption” can mean DC watts, AC inrush volt-amperes, AC holding volt-amperes, or electronically controlled average power. Compare like quantities under the same voltage, frequency, ambient, and duty definition.
From our analysis of TI, SMC, Bürkert, Parker, and ASCO documentation, wattage alone cannot predict switching time or magnetic margin. The published values describe different valve sizes, magnetic circuits, pressure conditions, coil technologies, and test methods. Use wattage for electrical and thermal compatibility; use the exact valve’s operating limits and response data for motion performance.
Why Do Pull-In and Holding Current Need Separate Checks?
Bürkert describes “Kick and Drop” electronics that briefly provide starting power and then reduce holding power. TI’s DRV110 follows the same broad peak-and-hold concept with adjustable peak current, peak duration, and hold current. These implementations are product-specific, but they establish that pull-in and holding are distinct design states (Bürkert Type 6013; TI DRV110).
At pull-in, the air gap is relatively large and the armature has not yet accelerated. The drive must overcome the return spring, static friction, pressure load, and inertia. After seating, the magnetic circuit usually needs less current to keep the armature in place. A suitable electronic driver can exploit this difference to reduce average coil heating.
Do not apply a generic holding-current percentage to an ordinary two-wire valve. A controller designed for one coil may fail to pull in another, or it may drop the armature when supply voltage or ambient temperature changes. Validate all of these parameters from the matched valve-and-driver documentation:
| Parameter | Pull-in concern | Holding concern |
|---|---|---|
| Supply tolerance | Minimum voltage must produce current quickly enough. | Maximum voltage and ripple affect heat and regulation margin. |
| Peak current and time | Must cover the worst permitted pressure, temperature, and mechanical load. | An unnecessarily long peak increases heating. |
| Hold current | Not the primary pull-in setting. | Must retain the seated armature under vibration and supply variation. |
| Coil temperature | Higher resistance can slow or reduce current rise. | Continuous loss sets the thermal steady state. |
| Duty rating | Repeated starts add thermal load. | Continuous energization requires a continuous-duty rating where specified. |
| Pilot conditions | Low pilot pressure may prevent the main stage from moving after pull-in. | Pilot leakage or backpressure can disturb the held state. |
SMC lists 0.35 W for the standard SY3000/5000 coil circuit and 0.1 W for a power-saving circuit after an effective energizing time longer than 67 ms. Those figures are useful examples, not universal targets. The option code and the valve’s manual determine whether the reduced-power behavior exists (SMC SY3000/5000).
How Do AC, DC, Latching, and Proportional Drives Differ?
ASCO identifies a copper shading ring as a feature used to limit core vibration in AC-powered solenoids. One ASCO L323 datasheet also separates AC inrush and holding volt-amperes while listing DC power in watts. Therefore, AC and DC coil ratings are not interchangeable even when their nominal voltage numbers look similar (ASCO Terminology; ASCO L323 Datasheet).
| Drive type | Electrical behavior | Best-fit use | Selection caution |
|---|---|---|---|
| Conventional DC | Current rises according to the coil and driver circuit; steady current causes resistive heating. | PLC and transistor-output systems with straightforward on/off control. | Observe polarity when the connector includes a diode, LED, or electronic circuit. |
| Conventional AC | Inrush and holding current differ as the armature closes the magnetic gap. | Installations built around the specified AC voltage and frequency. | Wrong frequency, a blocked armature, or an unseated core can cause abnormal current and heating. |
| Peak-and-hold DC | Electronics regulate a high pull-in current, then a lower holding current. | Low-power manifolds, high channel density, or heat-sensitive enclosures. | Valve coil, driver timing, suppression, and diagnostic behavior must be compatible. |
| Latching | A pulse changes state; the device retains state with little or no continuous power. | Battery systems or applications with long dwell times. | Restart state and de-energized safety behavior differ from spring-return valves. |
| Proportional | Controlled current produces a continuously variable force or position. | Pressure, flow, or position regulation. | Requires model-specific calibration, current control, dither, and feedback strategy. |
Parker’s Viking valve documentation gives model-specific voltage tolerances and marks listed solenoids for continuous duty. Another Parker direct-acting range states a different allowed voltage tolerance and defines response-time test conditions. These examples reinforce a simple rule: transfer neither voltage tolerance nor timing values from one family to another (Parker Viking Series; Parker Direct-Acting Valves).
If voltage type is the unresolved purchase decision, use the focused AC-versus-DC solenoid coil comparison. Even then, compare complete valve assemblies under one defined pickup, release, or actuator-arrival test.
How Do Suppression Circuits Affect Valve Release Time?
TI distinguishes slow current decay through a freewheeling diode from faster decay through a higher-voltage clamp. Both methods manage energy stored in the coil when the switching transistor turns off, but they produce different current and release behavior (TI, Basics of Driving Solenoid Loads).
A diode placed across a DC coil is simple and effective for limiting the turn-off voltage. However, the low recirculation voltage lets current persist. Magnetic force therefore decays more slowly, which can delay armature release. A TVS, Zener-based clamp, active clamp, or suitable driver can permit a higher controlled turn-off voltage and reduce current faster.
There is no universally correct suppression component. Choose it from the complete circuit limits:
- The PLC output or transistor must tolerate the resulting clamp voltage and energy.
- The coil connector may already contain a diode, varistor, LED, rectifier, or electronic power-saving circuit.
- A polarized suppressor makes DC polarity relevant even if the bare coil itself is not polarity sensitive.
- Faster current decay does not guarantee faster airflow response when spring force, sticky mechanics, pilot exhaust, or main-spool movement dominates.
- Electromagnetic compatibility, cable length, switching frequency, and safety architecture may impose additional constraints.
Do not treat external AC degaussing or an arbitrary reverse-current pulse as routine maintenance for a packaged pneumatic valve. The manufacturer designs residual magnetism, pole geometry, return springs, and electronics as an assembly. If a valve remains energized mechanically after current reaches zero, first check the specified release circuit, contamination, mechanical damage, pilot backpressure, and correct operator code.
What Should You Measure When a Valve Will Not Shift?
Parker publishes response times only with stated supply pressure, test volume, tubing, and voltage conditions. That makes a useful diagnostic point: “the valve is slow” is incomplete unless the electrical and pneumatic test boundaries are recorded for the same catalog test conditions (Parker Direct-Acting Valves).
Use an oscilloscope and current probe where switching transients matter. Use a pressure transducer at the pilot or working port where pneumatic delay matters. A handheld meter remains useful for resistance and steady voltage, but it can miss a short pull-in pulse, PWM current regulation, supply collapse, contact bounce, or flyback decay.
Record the following on the same cycle:
| Measurement | Where to measure | What it separates |
|---|---|---|
| Voltage at the energized connector | Across the coil terminals | Supply or output-stage loss from an internal valve fault. |
| Coil current waveform | In series or with a current probe | Open coil, shorted turns, wrong driver setting, inadequate peak, or slow decay. |
| Command-to-current delay | PLC output and coil-current traces | Controller, network, relay, and driver latency. |
| Current-to-armature event | Current trace plus motion, sound, or sensor evidence | Electrical buildup from mechanical movement. |
| Pilot-port pressure | At the valve during the shift | Solenoid pilot action from main-stage pressure availability. |
| Working-port pressure | At ports A and B or the application port | Main-valve switching from downstream restrictions and actuator load. |
| Coil resistance when cold and hot | Isolated, de-energized coil | Temperature rise, open circuit, and gross winding damage. |
Follow lockout, stored-energy, and electrical-safety procedures before disconnecting a coil or opening a pneumatic circuit. Never force a manual override unless the valve manual permits that procedure and the machine is in a safe state.
Selection and Commissioning Checklist
ASCO, Parker, SMC, Bürkert, and TI all publish product-specific electrical limits rather than a universal solenoid rule. A defensible selection therefore starts with the full valve order code and its matched coil or driver, then verifies the actual machine environment and pneumatic duty.
- Define the safe state. Choose normally closed, normally open, spring return, detented, or latching behavior from the machine risk assessment.
- Identify the valve architecture. Confirm direct acting, internally piloted, externally piloted, or proportional operation.
- Verify the pneumatic envelope. Check media, flow direction, minimum and maximum pressure, pilot range, exhaust conditions, temperature, and required flow.
- Match the electrical supply. Confirm AC or DC, nominal voltage, frequency, allowed tolerance, current or power, polarity, connector circuit, and ingress or hazardous-location rating.
- Check the duty definition. Continuous duty, intermittent duty, and electronically reduced-power operation are not interchangeable.
- Review switching electronics. Verify PLC output type, peak-and-hold compatibility, suppressor type, clamp voltage, PWM behavior, leakage current, and diagnostic pulses.
- Account for heat. Include ambient temperature, neighboring energized coils, enclosure ventilation, manifold density, and allowable surface temperature.
- Validate the complete response. Measure command, current, armature or pilot event, working-port pressure, and cylinder motion under the worst approved operating condition.
- Document acceptance limits. Save the exact datasheet revision, order code, test pressure, voltage, temperature, load, and timing reference.
If magnetic force itself is the design variable, use the separate guide to calculating solenoid plunger force. That analysis must include air-gap geometry and material behavior; a long-solenoid field equation is not a reliable substitute for the real valve magnetic circuit.
Electromagnetic Drive FAQs
The most reliable answers are model specific. ASCO, Parker, SMC, Bürkert, and TI document different coil powers, voltage tolerances, inrush behavior, driver methods, and test conditions. The following answers define the correct engineering boundary without turning one catalog example into a universal pneumatic rule.
Does correct voltage prove that a solenoid valve is healthy?
No. Measure voltage at the connected coil while it is energized, then inspect current through pull-in, hold, and turn-off. Correct open-circuit voltage can coexist with a resistive connector or weak output. Correct current can coexist with a jammed plunger, low pilot pressure, blocked pilot exhaust, or a stuck main spool.
Can I replace an AC coil with a DC coil of the same voltage?
No, unless the valve manufacturer explicitly approves that coil and operator combination. AC and DC versions can use different windings, shading components, power ratings, tolerances, and magnetic designs. The connector may also contain a rectifier or suppressor. Match the full valve, operator, coil, voltage, and frequency order code.
Why does a solenoid coil draw more power during pull-in?
It depends on the design. Conventional AC solenoids can have higher inrush before the armature closes the air gap. Electronic DC drivers may intentionally command a peak current and then reduce it to a holding value. A conventional DC coil without that electronics does not automatically create the same controlled peak-and-hold profile.
Does a flyback diode make a pneumatic valve slower?
It can delay electrical current decay and therefore armature release. The size of the pneumatic timing effect still depends on spring force, valve mechanics, pilot exhaust, pressure, and main-stage motion. Use the valve and output-device requirements to choose a diode, TVS, active clamp, or integrated suppressor; do not remove protection blindly.
What causes a solenoid valve to buzz or overheat?
Possible causes include incorrect AC frequency or voltage, an armature that cannot seat, excessive ambient temperature, the wrong duty rating, a mismatched coil, abnormal driver output, or mechanical contamination. Measure connected voltage and current, verify the order code, and inspect the armature and pneumatic load before replacing components.
Sources
- Texas Instruments DRV110 Datasheet, peak-current, keep-time, hold-current, and PWM current-control behavior. Retrieved 2026-07-22.
- Texas Instruments, Basics of Driving Solenoid Loads, freewheeling, clamping, and solenoid-current decay. Retrieved 2026-07-22.
- SMC SY3000/5000 New Product Information, standard and power-saving coil power examples. Retrieved 2026-07-22.
- Bürkert Type 6013 Kick and Drop Datasheet, direct-acting construction and starting-versus-holding power. Retrieved 2026-07-22.
- Parker Viking Series Catalog, voltage tolerances and continuous-duty specifications. Retrieved 2026-07-22.
- Parker Direct-Acting Solenoid Valves, voltage tolerance and response-time test conditions. Retrieved 2026-07-22.
- ASCO Solenoid Valve Engineering Information, coil construction, continuous energization, ambient, and thermal guidance. Retrieved 2026-07-22.
- ASCO Solenoid Valve Terminology, solenoid components and AC shading-ring function. Retrieved 2026-07-22.