

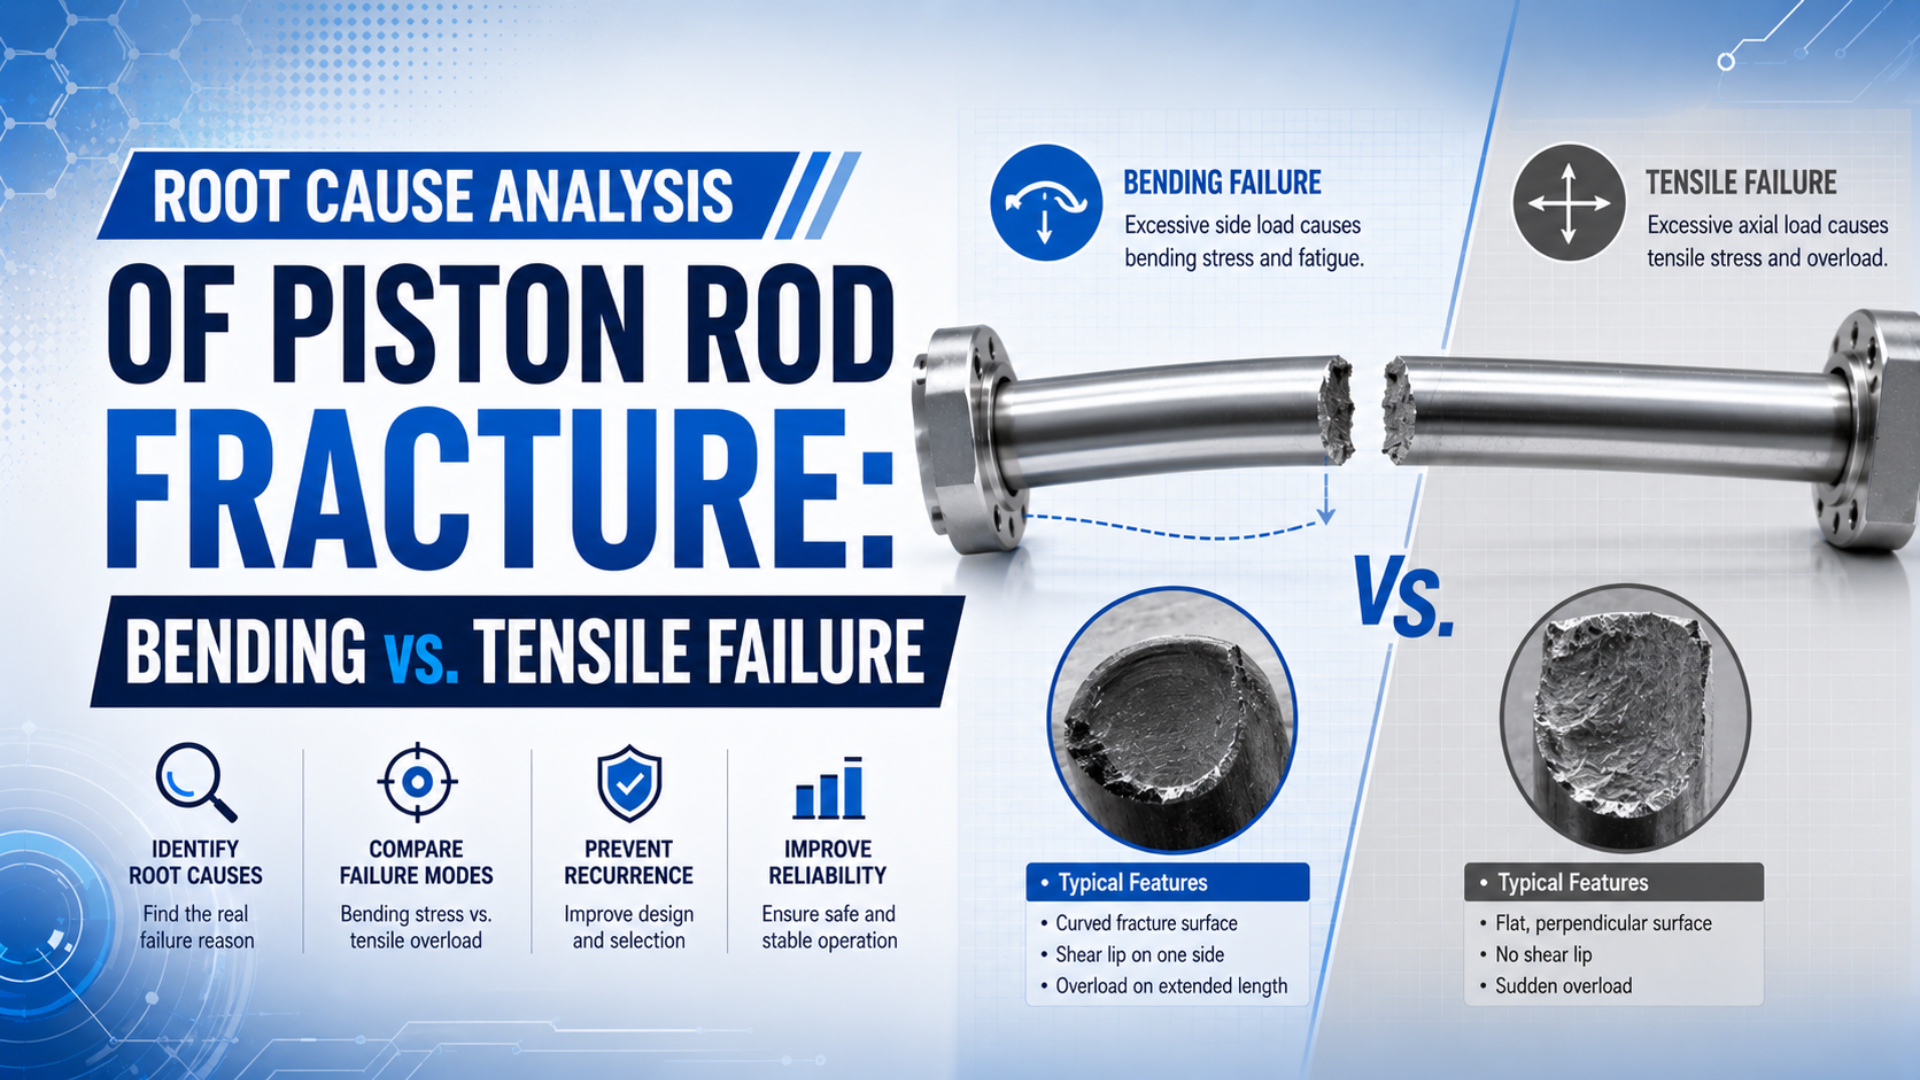
Piston rod fracture analysis should not begin by choosing “bending” or “tensile” from a photograph. Bending is a loading mode that places one side of the rod in tension and the other in compression. A sound investigation separately identifies the applied load, the crack-growth mechanism, and the final rupture that completed the break.
NASA divides fatigue fracture into 3 stages: initiation, propagation, and final rupture. That framework is more useful than labeling the entire surface “brittle” or “ductile” because the small origin region and the final fast-fracture region may record different events (NASA Fractography Handbook, accessed 2026).
Key Takeaways
- Isolate pneumatic and stored mechanical energy before preserving evidence.
- Treat bending, axial loading, fatigue, and final overload as different analytical layers.
- Reconstruct both chamber pressures, rod position, alignment, guides, stops, and external loads.
- Match corrective action to the confirmed origin and load path, not the most dramatic fracture feature.
Bepto supports industrial cylinder selection and failure reviews through its engineering and manufacturing team. If a failed rod is holding up production, send both fracture halves, cylinder identification, operating records, and installation photographs through the technical support form.
What Should You Do Before Touching a Broken Piston Rod?
OSHA 29 CFR 1910.147 includes pneumatic energy among hazardous energy sources and requires stored or residual energy to be relieved, disconnected, restrained, or otherwise rendered safe before servicing. Isolate the supply, exhaust trapped pressure, restrain gravity or spring loads, and verify the zero-energy condition before approaching the failed axis (OSHA 1910.147, accessed 2026).
Follow the machine’s approved lockout procedure. Closing a supply valve is not sufficient if pressure remains in a cylinder chamber, accumulator, receiver, pilot line, or flexible tube. A broken rod can also release a supported carriage, counterweight, clamp, or overhung fixture. Mechanical restraint must address those loads before anyone handles the actuator.
Once the machine is safe, preserve the evidence:
- Photograph the installation from several directions before removing components.
- Mark the cylinder, cap end, rod end, top, bottom, and motion direction.
- Record the rod position and whether the last commanded motion was extension or retraction.
- Retain both fracture halves and protect the mating surfaces from contact.
- Bag loose particles separately and label their original location.
- Preserve rod seals, bearing, gland, piston, mounts, fasteners, guides, stops, and failed accessories.
- Export controller alarms, pressure traces, maintenance records, and the last production sequence.
Do not wire-brush, grind, polish, rub, or force the fracture faces together. Do not remove corrosion products or oil until the investigator decides how they will be sampled. Cleaning can erase crack-origin deposits, fine surface marks, transfer evidence, and the relationship between the origin and the rod’s installed orientation.
In our experience reviewing replacements, the most decisive evidence is often distributed across several parts: the rod origin, one-sided bearing wear, seal damage, mount witness marks, and guide condition. A cleaned fracture face presented without its mating half or installation orientation rarely carries enough context to support a durable correction.
Bending, Axial Tension, Compression, and Fatigue Are Different Layers
NASA’s 3-stage fatigue model separates crack initiation, progressive growth, and final rupture, while ASTM E1823 standardizes terminology for fracture and fatigue testing. Use that hierarchy to avoid a false choice: bending or axial force describes the loading; fatigue or single-event overload describes how damage developed; ductile, brittle, or mixed describes final rupture behavior (ASTM E1823, accessed 2026).
A pneumatic cylinder rod may experience several loads in the same event:
- Axial compression during extension, especially when the piston drives the rod against a resistant load.
- Axial tension during retraction or when an external mechanism pulls on the rod.
- Bending from side load, offset attachment, poor alignment, an unsupported overhung mass, or guide error.
- Torsion if the rod or attachment is forced to transmit torque.
- Impact when the piston, load, or mechanism strikes a stop.
- Cyclic stress when any of these loads repeats and initiates a fatigue crack.
The final unbroken ligament may then fail in overload after a fatigue crack has reduced the effective cross-section. That last region can look dramatic, but it is the consequence, not necessarily the root cause.
A claim such as “bending fracture” is incomplete until the report identifies what created the bending moment and why the rod could not tolerate it. The cause may sit outside the cylinder: an offset clevis, guide binding, worn pivot, loose mount, product jam, or load that contacts the rod before the intended stop.
A bending failure is a fracture in which the bending component of the service load is necessary to explain crack initiation or final rupture. A fatigue fracture is progressive cracking under repeated or fluctuating stress. Those definitions can overlap: repeated bending may initiate a surface fatigue crack, followed by final overload of the remaining section.
For another component-level example of separating fatigue growth from final overload, see our cylinder tie-rod and mount fatigue analysis.
How Do You Reconstruct the Rod Stress State?
SMC warns that maximum cylinder-generated force can act when an extended rod is stopped by an external stopper, and its cylinder selection guide uses mounting-specific rod buckling limits. Start with the actual event geometry, not catalog bore pressure alone, because a restrained piston, long extension, or offset load changes the rod stress state (SMC Air Cylinder Selection, accessed 2026).
For a first-pass elastic screening calculation, separate axial force from bending moment. The nominal axial stress is:
Here, is nominal axial stress, is the axial force at the section, and is the rod’s net metallic cross-sectional area at that section.
The nominal bending stress at the outer fiber is:
Here, is the bending moment at the section, is the distance from the neutral axis to the surface, and is the second moment of area. For a solid circular rod of diameter :
The two surface extremes under combined axial load and bending are screened as:
This equation explains why bending cannot be separated from tension at the surface. One side receives the plus term while the opposite side receives the minus term. If axial compression is present, bending can still make one surface less compressive or locally tensile.
Use measured cylinder-port pressures where possible. On a double-acting single-rod cylinder, a simplified axial force balance is:
Here, and are cap-end and rod-end chamber pressures, and are their effective piston areas, and the sign convention must match the investigated motion. Upstream regulator pressure alone cannot reconstruct dynamic rod force because valve, tube, fitting, and exhaust losses change chamber pressure.
These equations are screening tools, not fracture proof. Threads, grooves, cross-holes, damage, corrosion pits, surface residual stress, plating defects, and local contact introduce stress concentration. Large deflection, yielding, buckling, impact, and dynamic interaction require a more suitable model.
Use the Cylinder Force Calculator to check pressure-area force, then document the deductions for opposing chamber pressure and external load. For long rods in compression, use the Piston Rod Buckling Calculator and confirm its end-condition assumptions against the actual mounting.
Our horizontal piston-rod deflection guide covers overhung geometry and bending screening. The long-stroke rod buckling guide addresses instability under axial compression.
What Can the Fracture Surface Actually Prove?
NASA states that fatigue striations are a Stage 2 crack-growth feature visible only at high magnification and that not all materials display them. Macroscopic beach marks may reveal changes in crack-front position, but neither feature should be inferred from a low-resolution photograph. The final Stage 3 region may be ductile, brittle, or mixed (NASA Fractography Handbook, accessed 2026).
Begin with both fracture halves under controlled lighting. Map the surface relative to the installed top, bottom, cap end, rod end, and direction of side load. Then move from unaided observation to stereomicroscopy and, when required, scanning electron microscopy. Material verification and metallography should be planned so sectioning does not destroy the origin.
In practical terms, the fracture surface can establish a sequence only when its features are tied to location and scale. First locate one or more origins at the rod surface, thread, shoulder, pit, score, or coating discontinuity. Next map any progressive region and determine whether its markings converge on the same origin. Then identify the final ligament and assess whether it separated by ductile, brittle, or mixed rupture. Compare that map with the installed bending plane, axial load direction, wear orientation, and event history. NASA’s 3-stage model supports this order, but it does not turn every visible band into a fatigue striation or every smooth area into brittle fracture. A defensible conclusion states which observations were macroscopic, which required microscopy, and which service data independently corroborated the proposed sequence.
| Observation | What it may support | What it does not prove by itself |
|---|---|---|
| Surface origin at a pit, score, thread root, or plating defect | A local crack-initiation site and stress raiser | The applied load magnitude or complete root cause |
| Progressive curved arrest or beach marks | Intermittent fatigue crack-front growth under changing service conditions | Bending specifically, or one cycle per visible band |
| Microscopic fatigue striations | Progressive cyclic crack advance in a suitable material | One striation per machine cycle in every service history |
| Small final rupture ligament | A crack occupied much of the section before final separation | The reason the crack initiated |
| Gross plastic deformation and shear lips | Ductile contribution to final overload | Pure axial tension or absence of earlier fatigue |
| Little visible deformation | A brittle-looking final region or constrained stress state | Hydrogen embrittlement without material and process evidence |
| Two or more origins | Multiple high-stress sites or distributed damage | A single uniform load or simultaneous initiation |
| One-sided rod, bearing, or gland wear | Persistent side loading or misalignment | That side loading alone initiated the fracture |
Macroscopic radial or chevron-like markings can help point toward an origin, but their interpretation depends on material and fracture mode. A cup-and-cone profile can support ductile tensile overload in an appropriate round specimen, yet an installed rod has a different geometry, surface condition, constraint, and load history. Do not turn a textbook pattern into a universal field diagnosis.
The investigator should also compare the two halves. One surface can preserve deposits or fine markings that the other has lost. Secondary cracks near the origin, coating discontinuities, corrosion beneath plating, and microstructural changes may require cross-sectioning adjacent to the fracture rather than through its most informative point.
How Do You Reconstruct the Pneumatic and Mechanical Load Path?
Parker notes that off-center mounting or loading can produce side load, while SMC treats mounting and buckling condition as selection variables. Reconstruct the complete path from chamber pressure through piston, rod, attachment, guide, workpiece, and machine frame. A correct stress formula supplied with the wrong load path still gives the wrong answer (Parker Pneumatic Actuator Catalog, accessed 2026).
Collect evidence for the final normal cycle and the failure cycle:
- cap-end and rod-end pressure at the cylinder ports;
- supply pressure during motion, valve command, and exhaust restriction;
- extension or retraction direction, speed, acceleration, and rod position;
- load mass, center of gravity, external force, and process contact;
- mount type, pin freedom, clevis alignment, and fastener condition;
- guide spacing, bearing clearance, parallelism, and signs of binding;
- hard stops, cushions, shock absorbers, and their actual contact sequence;
- jams, tooling collisions, dropped loads, and controller faults;
- rod straightness, scoring orientation, bushing wear, and seal damage;
- prior repairs, rod replacement, guide adjustment, and pressure changes.
Pressure must be time-aligned with position and command. A static gauge reading taken after the event cannot show whether the rod was compressed against a closed stop, pulled during retraction, or exposed to a pressure spike while motion was blocked. Likewise, motor current from a connected mechanism may reveal an external jam that cylinder pressure alone cannot explain.
Trace geometry at several rod extensions. An overhung load creates a bending moment approximately equal to force times perpendicular offset, but the offset may change through the stroke. A pivoted linkage can reverse the direction of side load. A long rod may remain straight when retracted and become vulnerable to deflection or buckling near full extension.
Inspect how the machine guides the load. The cylinder rod should transmit axial force; it should not be the sole linear guide unless the actuator was designed for that duty. One-sided wear on the rod bearing or gland is valuable corroboration when its orientation agrees with the fracture origin and calculated bending plane. For preventive diagnosis before fracture, see how side loading affects rod bearings and seals.
If the failure occurred at a stop, inspect the energy-control hardware rather than simply specifying a thicker rod. Internal cushions and external shock absorbers have finite operating boundaries. Our external shock absorber sizing guide explains the energy and effective-mass inputs that must be validated.
How Should Material, Geometry, and Surface Process Be Verified?
ASTM E466 controls material, specimen geometry, surface condition, and applied stress in force-controlled axial fatigue testing, while warning that specimen results do not automatically represent a full component. That limitation matters: a replacement rod may meet a nominal steel grade yet still differ in hardness, machining marks, plating condition, residual stress, or local geometry (ASTM E466-21, accessed 2026).
Build a verification plan around the failure hypothesis:
- Dimensions: measure diameter, thread root, shoulder radii, grooves, cross-holes, straightness, and remaining wall if the rod is hollow.
- Material: verify chemistry, hardness, microstructure, heat treatment, and decarburization or case depth where relevant.
- Surface: document roughness direction, scores, pits, coating cracks, adhesion, porosity, and thickness.
- Fractography: locate origins, progressive regions, final rupture, secondary cracks, and contamination.
- Metallography: section adjacent to a selected origin to evaluate microstructure and coating-substrate interfaces.
- Mechanical testing: use retained material or representative specimens only when the test can answer a defined question.
- Manufacturing records: compare drawings, material certificates, heat treatment, machining, grinding, plating, and inspection records.
Hydrogen embrittlement is a hypothesis, not a visual shortcut. ASTM B650 includes stress-relief and hydrogen-embrittlement treatment requirements for engineering chromium coatings, while ASTM F519 addresses mechanical evaluation of plating or coating processes and service environments (ASTM B650-23, ASTM F519-23, accessed 2026).
Investigate hydrogen only when the material strength or hardness, manufacturing route, electrocleaning or plating history, time to failure, delayed cracking behavior, and fracture evidence make it credible. Obtain pre-plate stress-relief and post-plate baking records where applicable. A brittle-looking area alone cannot distinguish hydrogen effects from high constraint, unfavorable microstructure, environmental cracking, or rapid overload.
For rod surface-process boundaries and records to request, see our hard chrome versus nitriding comparison.
How Do You Match Corrective Action to the Confirmed Cause?
ISO 12108 covers fatigue-crack-growth testing from threshold behavior through rapid unstable fracture under defined Mode I, linear-elastic, constant-load-ratio conditions. Its narrow boundary is a useful lesson for field RCA: corrective action is credible only when the test or calculation represents the mechanism and conditions being claimed (ISO 12108:2018, accessed 2026).
Do not solve every rod fracture by increasing diameter. A larger rod can improve nominal stress and buckling resistance, but it does not correct guide binding, an offset load, uncontrolled impact, a sharp transition, defective surface processing, or an unintended pressure state.
| Confirmed evidence | Corrective action | Verification before release |
|---|---|---|
| Surface fatigue origin aligned with bending plane and side-wear evidence | Realign mounts and guides, remove offset, add a load guide, or select an actuator intended for guided loads | Measure alignment and side force across the full stroke; repeat the production load profile |
| Compression instability with long effective length | Shorten unsupported length, change mounting restraint, increase rod stiffness, or reduce compressive demand | Recalculate buckling with the actual end condition and confirm full-stroke stability |
| Progressive crack from a thread, shoulder, groove, or machining defect | Improve radius, finish, transition geometry, inspection, or load distribution | Inspect the revised feature and validate stress or fatigue performance under representative loading |
| Impact or stop overload without prior fatigue | Correct motion profile, cushioning, external energy absorber, stop sequence, or interlock | Test worst-case moving mass, speed, pressure, and stop condition |
| Coating or corrosion-assisted initiation | Correct material and surface process, environment protection, coating quality, and handling | Verify coating records, surface condition, and representative environmental exposure |
| Credible hydrogen-embrittlement evidence | Control material hardness, cleaning and plating process, relief treatment, and process qualification | Audit records and apply an appropriate process-evaluation test |
| Axial tensile overload during retraction or external pulling | Remove the overload, correct force path, resize the actuator or attachment, and add overload protection | Measure retraction pressure and external tensile force in the actual cycle |
Validation should attempt to reproduce the causal chain without reproducing a hazardous failure. For example, confirm guide load and bending strain at safe pressure, verify stop timing at reduced energy, or qualify a surface process on representative specimens. A successful unloaded cylinder cycle does not validate a correction for a load-dependent fracture.
Replacement intervals should come from verified duty, inspection findings, and damage tolerance or life testing appropriate to the design. A universal calendar interval or fixed cycle count is not defensible for all rod materials, diameters, environments, guides, loads, and surface processes.
What Belongs in the Root Cause Report and RFQ Evidence Package?
ASTM E466 states that metallic fatigue results depend on controlled material, geometry, surface condition, stress, and testing method. A useful root cause report therefore records both positive findings and uncontrolled variables. It should distinguish observations, calculations, interpretations, alternative hypotheses, and the evidence that falsified each rejected explanation (ASTM E466-21, accessed 2026).
At minimum, include:
- cylinder manufacturer, model, serial or lot, bore, stroke, rod diameter, and mounting;
- rod drawing, material specification, hardness, heat treatment, coating, and manufacturing records;
- as-found photographs, fracture-half orientation, evidence custody, and cleaning history;
- final commands, alarms, motion direction, rod position, cycle state, and abnormal events;
- synchronized chamber pressures, position, speed, load, and controller or valve signals;
- installation geometry, guide and mount inspection, straightness, wear, stops, and cushioning;
- macrofractography, microscopy, material test, and dimensional results;
- axial, bending, buckling, impact, and fatigue screening assumptions where applicable;
- primary root cause, contributing factors, alternative hypotheses, and confidence limits;
- corrective actions, accountable owners, validation method, and release criteria.
For a replacement or redesign RFQ, attach the evidence that changes selection: dynamic load and center of gravity, side-force or guide arrangement, pressure at both ports, speed and stop strategy, working environment, required rod surface, mounting tolerance, and expected inspection access. “Same dimensions as failed unit” reproduces the interface, not necessarily a suitable design.
The final report should answer four questions in plain language:
- Where did the crack start?
- What load and local condition initiated it?
- How did the crack grow, and what completed the fracture?
- Which verified change prevents the same causal chain?
If any answer remains unsupported, label it as an open hypothesis and state the evidence needed to resolve it.
Frequently Asked Questions
NASA’s 3-stage fatigue framework explains why quick visual labels are unreliable: initiation, progressive growth, and final rupture can leave different features on one piston rod. These answers summarize the decisions that can be made from field evidence and the points that require laboratory verification (NASA Fractography Handbook, accessed 2026).
Can a piston rod fail from bending even if the cylinder force is axial?
Yes. The piston force may be nominally axial while an offset rod attachment, misaligned clevis, worn pivot, binding guide, unsupported load, or contact with a stop creates a bending moment. Confirm it by matching calculated geometry with the fracture origin, rod straightness, and one-sided wear rather than relying on one clue.
Does a cup-and-cone fracture prove pure tensile overload?
No. A cup-and-cone profile can support ductile tensile overload in an appropriate material and stress state, but an installed rod may experience bending, constraint, prior fatigue, surface damage, and mixed loading. Examine the entire fracture, locate the origin, and determine whether progressive crack growth reduced the final ligament first.
Do beach marks prove the rod failed from fatigue?
Beach-like arrest marks can support progressive crack-front growth, but surface appearance alone is insufficient. Confirm the origin, progression direction, material, loading history, and microscopic evidence. NASA notes that fatigue striations are high-magnification Stage 2 features and that not every material displays them.
Can high pneumatic pressure alone explain a piston rod fracture?
Pressure is only one input. Calculate force from both chamber pressures and effective areas, then account for external load, motion direction, restraint, rod extension, stops, and alignment. A moderate pressure can still create damaging bending or buckling, while a high regulator setting may never reach the investigated chamber dynamically.
When should hydrogen embrittlement be investigated?
Investigate it when susceptible high-strength material, cleaning or electroplating history, delayed cracking, missing relief treatment, and fracture evidence form a consistent hypothesis. Request hardness, process, and baking records and use an appropriate evaluation method. A brittle-looking surface or hard-chrome coating alone does not establish hydrogen embrittlement.
A Field-to-Laboratory Decision Path
NASA’s 3 fracture stages supply the backbone for the workflow, while OSHA’s hazardous-energy rule controls its safe starting point. Move from evidence preservation to progressively more destructive tests. Do not section, clean, or mechanically fit fracture surfaces until the proposed action and the evidence it may destroy have been reviewed.
The stop condition is not “a plausible story.” It is convergence: the fracture origin, stress state, material and surface condition, service record, and corrective-action test all support the same causal chain. When they do not converge, preserve the disagreement in the report instead of converting uncertainty into certainty.