Your pneumatic system is bleeding compressed air through poorly installed push-in fittings, costing thousands in wasted energy1 while compromising system performance and creating safety hazards that could shut down your entire operation. 😰
Preventing pneumatic leaks requires proper push-in fitting installation through clean hose preparation, correct insertion depth, adequate hose support, appropriate fitting selection for your application, and regular maintenance inspection – following these best practices eliminates 95% of connection-related leaks while ensuring reliable, long-lasting pneumatic connections that maintain system efficiency.
Recently, I worked with Sarah, a maintenance engineer at a packaging facility in Ohio, who was losing $3,000 monthly due to compressed air leaks from improperly installed push-in fittings. After implementing our comprehensive installation protocol, her facility achieved zero leak-related failures over 18 months and reduced compressed air costs by 40%.
Table of Contents
- What Are the Most Critical Steps for Leak-Free Push-in Fitting Installation?
- How Do You Select the Right Push-in Fitting for Your Specific Application?
- Which Common Installation Mistakes Cause the Most Pneumatic Leaks?
- What Maintenance Practices Keep Push-in Connections Leak-Free Long-Term?
What Are the Most Critical Steps for Leak-Free Push-in Fitting Installation?
Proper installation technique is the foundation of reliable, leak-free pneumatic connections that perform consistently under pressure.
Critical installation steps include making clean, square hose cuts with proper tools, inserting tubing to full depth until resistance is felt, providing adequate strain relief2, using compatible hose materials, and performing pressure testing at 1.5x working pressure – these steps ensure optimal seal engagement, prevent premature wear, and achieve connection reliability exceeding 99% when properly executed.

Hose Preparation Fundamentals
Essential Cutting Techniques:
- Clean cuts: Use sharp pneumatic hose cutters, never knives or scissors
- Square ends: Ensure perpendicular cuts to prevent seal bypass
- Smooth finish: Remove burrs and rough edges that damage seals
- Proper length: Account for full insertion depth plus working length
Quality Control Checklist:
- ✅ Cut is perfectly square and clean
- ✅ No visible burrs or damage
- ✅ Hose end is free of contamination
- ✅ Proper hose material for application
Installation Process Steps
Step-by-Step Installation Protocol:
| Step | Action | Critical Point | Common Error |
|---|---|---|---|
| 1 | Inspect fitting | Check for damage or contamination | Using damaged fittings |
| 2 | Prepare hose | Clean, square cut | Angled or rough cuts |
| 3 | Insert fully | Push until resistance felt | Partial insertion |
| 4 | Continue pushing | Bottom out in fitting body | Stopping at first resistance |
| 5 | Tug test | Verify secure connection | Skipping verification |
| 6 | Mark depth | Reference for future inspection | No insertion reference |
Pressure Testing and Validation
Testing Protocol Requirements:
- Initial pressure: 1.5x working pressure for 5 minutes
- Leak detection: Electronic detector or soap solution
- Pull test: Verify mechanical connection strength
- Documentation: Record test results and date
Acceptance Criteria:
- Zero detectable leaks at test pressure
- No hose movement during pull test
- Proper insertion depth maintained
- Clean, undamaged connection appearance
How Do You Select the Right Push-in Fitting for Your Specific Application?
Choosing the correct push-in fitting ensures optimal performance and prevents leaks caused by incompatible components.
Select push-in fittings based on hose material compatibility (polyurethane works best), pressure rating requirements, temperature range, connection type needed, and environmental conditions – proper selection prevents seal degradation, ensures adequate grip strength, and provides reliable service life exceeding 5 years in typical industrial applications.
Material Compatibility Matrix
Hose Material Performance:
| Hose Type | Compatibility | Grip Strength | Seal Quality | Recommended Use |
|---|---|---|---|---|
| Polyurethane (PU)3 | Excellent | 90-95% | Superior | High-pressure systems |
| Nylon (PA) | Good | 85-90% | Good | General applications |
| Rubber (NBR) | Fair | 70-80% | Fair | Low-pressure only |
| PVC | Poor | 60-70% | Poor | Not recommended |
Pressure and Temperature Considerations
Rating Requirements:
- Working pressure: Fitting rating must exceed system pressure by 25%
- Temperature range: Consider both ambient and process temperatures
- Pressure cycling: Account for dynamic loading effects
- Safety factor: Minimum 4:1 burst to working pressure ratio4
Environmental Factors:
- Chemical exposure: Ensure seal compatibility with process fluids
- UV resistance: Required for outdoor installations
- Vibration resistance: Critical for mobile equipment
- Temperature cycling: Expansion/contraction effects on seals
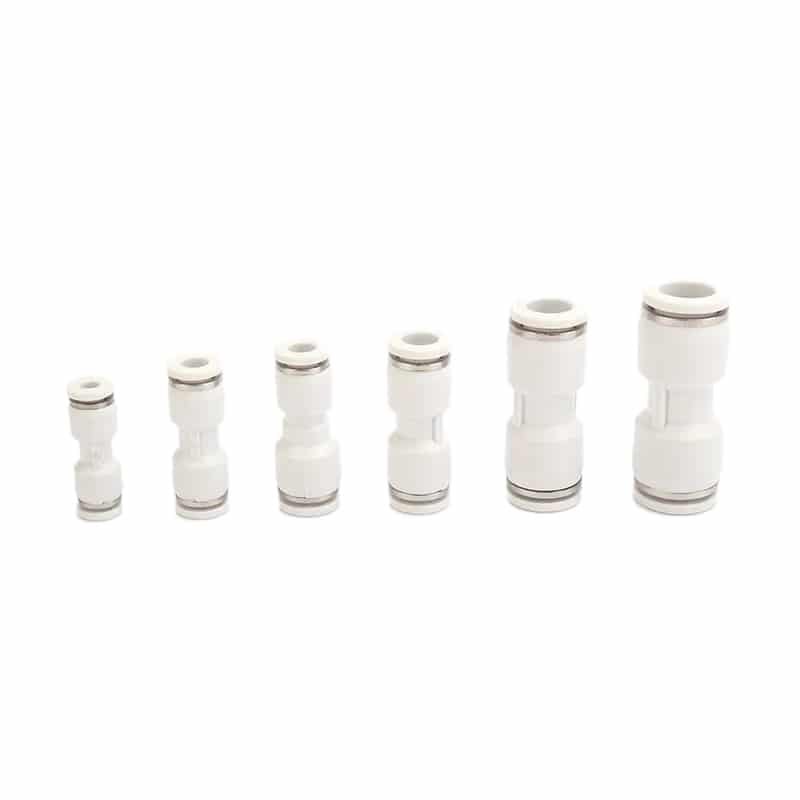
Bepto Push-in Fitting Solutions
Our Rodless Cylinder Systems:
We provide premium push-in fittings specifically designed for our rodless cylinders:
- Pressure ratings: Up to 300 PSI working pressure
- Temperature range: -40°F to 200°F operating capability
- Material options: Brass, stainless steel, and composite bodies
- Size range: 4mm to 16mm tube compatibility
- Quality assurance: 100% pressure tested before shipment
Which Common Installation Mistakes Cause the Most Pneumatic Leaks?
Understanding and avoiding common installation errors prevents the majority of push-in fitting failures and leaks.
The most leak-causing installation mistakes include incomplete hose insertion (causing 40% of failures), using damaged or contaminated hose ends, incorrect hose material selection, inadequate strain relief, and skipping pressure testing – avoiding these errors through proper training and quality control eliminates 90% of premature connection failures.
Top Installation Errors
Critical Mistake Analysis:
| Error Type | Frequency | Leak Risk | Prevention Method |
|---|---|---|---|
| Incomplete insertion | 40% | High | Proper training, depth marking |
| Damaged hose ends | 25% | High | Quality cutting tools |
| Wrong hose material | 15% | Medium | Material compatibility chart |
| No strain relief | 12% | Medium | Proper support installation |
| Contaminated connections | 8% | Low | Clean assembly practices |
Incomplete Insertion Problems
Insertion Depth Issues:
- Partial engagement: Seal not fully compressed
- Weak connection: Reduced grip strength
- Pressure sensitivity: Leaks develop under load
- Progressive failure: Connection loosens over time
Prevention Strategies:
- Training emphasis: Teach “push until resistance, then push more”
- Visual indicators: Use fittings with insertion depth windows
- Quality control: Mandatory tug testing after installation
- Documentation: Mark proper insertion depth for reference
Hose End Damage Prevention
Cutting Tool Requirements:
- Sharp blades: Replace cutting tools regularly
- Proper technique: Single, clean cutting motion
- Deburring: Remove all cutting artifacts
- Inspection: Visual verification before installation
Michael, a plant engineer at an automotive facility in Michigan, was experiencing 15-20 leak failures monthly due to poor cutting practices. After implementing our recommended cutting procedures and tools:
- Reduced failures to less than 2 per month
- Eliminated emergency weekend repairs
- Saved $45,000 annually in maintenance costs
- Improved overall system reliability by 85%
What Maintenance Practices Keep Push-in Connections Leak-Free Long-Term?
Regular maintenance and inspection ensure push-in fittings maintain leak-free performance throughout their service life.
Effective maintenance includes monthly visual inspections for leaks and damage, quarterly pressure testing of critical connections, annual replacement of high-cycle fittings, proper documentation of all maintenance activities, and immediate replacement of any compromised connections – these practices extend fitting life 3-5 times beyond typical service intervals while preventing costly emergency failures.
Inspection Schedule and Procedures
Maintenance Frequency:
- Daily: Visual check during routine operations
- Weekly: Systematic leak detection on critical circuits
- Monthly: Detailed inspection with documentation
- Quarterly: Pressure testing and connection verification
- Annually: Preventive replacement of wear components
Leak Detection Methods
Detection Techniques:
- Electronic detectors: Most sensitive and accurate
- Soap solution: Cost-effective for routine checks
- Ultrasonic detection5: Effective in noisy environments
- Pressure monitoring: System-wide leak assessment
Documentation Requirements:
- Leak location: Precise identification and marking
- Severity assessment: Quantify leak rate and impact
- Corrective action: Repair or replacement performed
- Follow-up testing: Verification of repair effectiveness
Preventive Replacement Strategy
Replacement Criteria:
- High-cycle connections: Replace annually
- Critical applications: Preventive replacement at 80% service life
- Environmental exposure: More frequent replacement in harsh conditions
- Performance degradation: Replace at first sign of leakage
Bepto Maintenance Support:
We provide comprehensive maintenance support for our pneumatic systems:
- Maintenance training: Proper inspection and replacement techniques
- Replacement parts: Full inventory of push-in fittings and components
- Technical support: Expert guidance for troubleshooting and optimization
- Documentation systems: Maintenance tracking and scheduling tools
Regular maintenance is your best investment in pneumatic system reliability – a few minutes of inspection prevents hours of emergency repairs! 🔧
Conclusion
Proper push-in fitting installation and maintenance eliminates costly pneumatic leaks – invest in training and quality practices to ensure reliable, efficient system operation. ⚙️
FAQs About Push-in Fitting Installation and Leak Prevention
Q: How deep should I insert the hose into a push-in fitting?
Insert the hose until you feel resistance, then continue pushing until it bottoms out completely in the fitting body – partial insertion is the leading cause of push-in fitting leaks and connection failures.
Q: Can I reuse push-in fittings after removing the hose?
While technically possible, reusing push-in fittings significantly increases leak risk due to seal wear and contamination, so we recommend using new fittings for critical applications to ensure reliable connections.
Q: What’s the best way to detect small pneumatic leaks in push-in connections?
Electronic ultrasonic leak detectors provide the most accurate detection, but soap solution applied to connections during pressure testing is cost-effective and reliable for routine maintenance inspections.
Q: How often should I replace push-in fittings in high-cycle applications?
Replace push-in fittings annually in high-cycle applications (>100,000 cycles/year) or when any signs of leakage appear, as preventive replacement costs far less than emergency repairs and system downtime.
Q: Why do my push-in fittings leak only under high pressure?
High-pressure leaks typically indicate incomplete hose insertion or damaged hose ends that allow seal bypass – ensure full insertion depth and use proper cutting tools to create clean, square hose ends for reliable sealing.
-
Access industry reports and data on how much energy is lost annually due to compressed air leaks in industrial systems. ↩
-
Learn the engineering principles behind proper strain relief for tubing to prevent mechanical stress and connection failure. ↩
-
Review the technical specifications and performance characteristics of polyurethane (PU) tubing for pneumatic applications. ↩
-
Understand the engineering safety standard that defines the required ratio between a component’s burst pressure and its normal working pressure. ↩
-
Discover the technology behind ultrasonic detectors and how they identify the high-frequency sound produced by gas leaks. ↩