

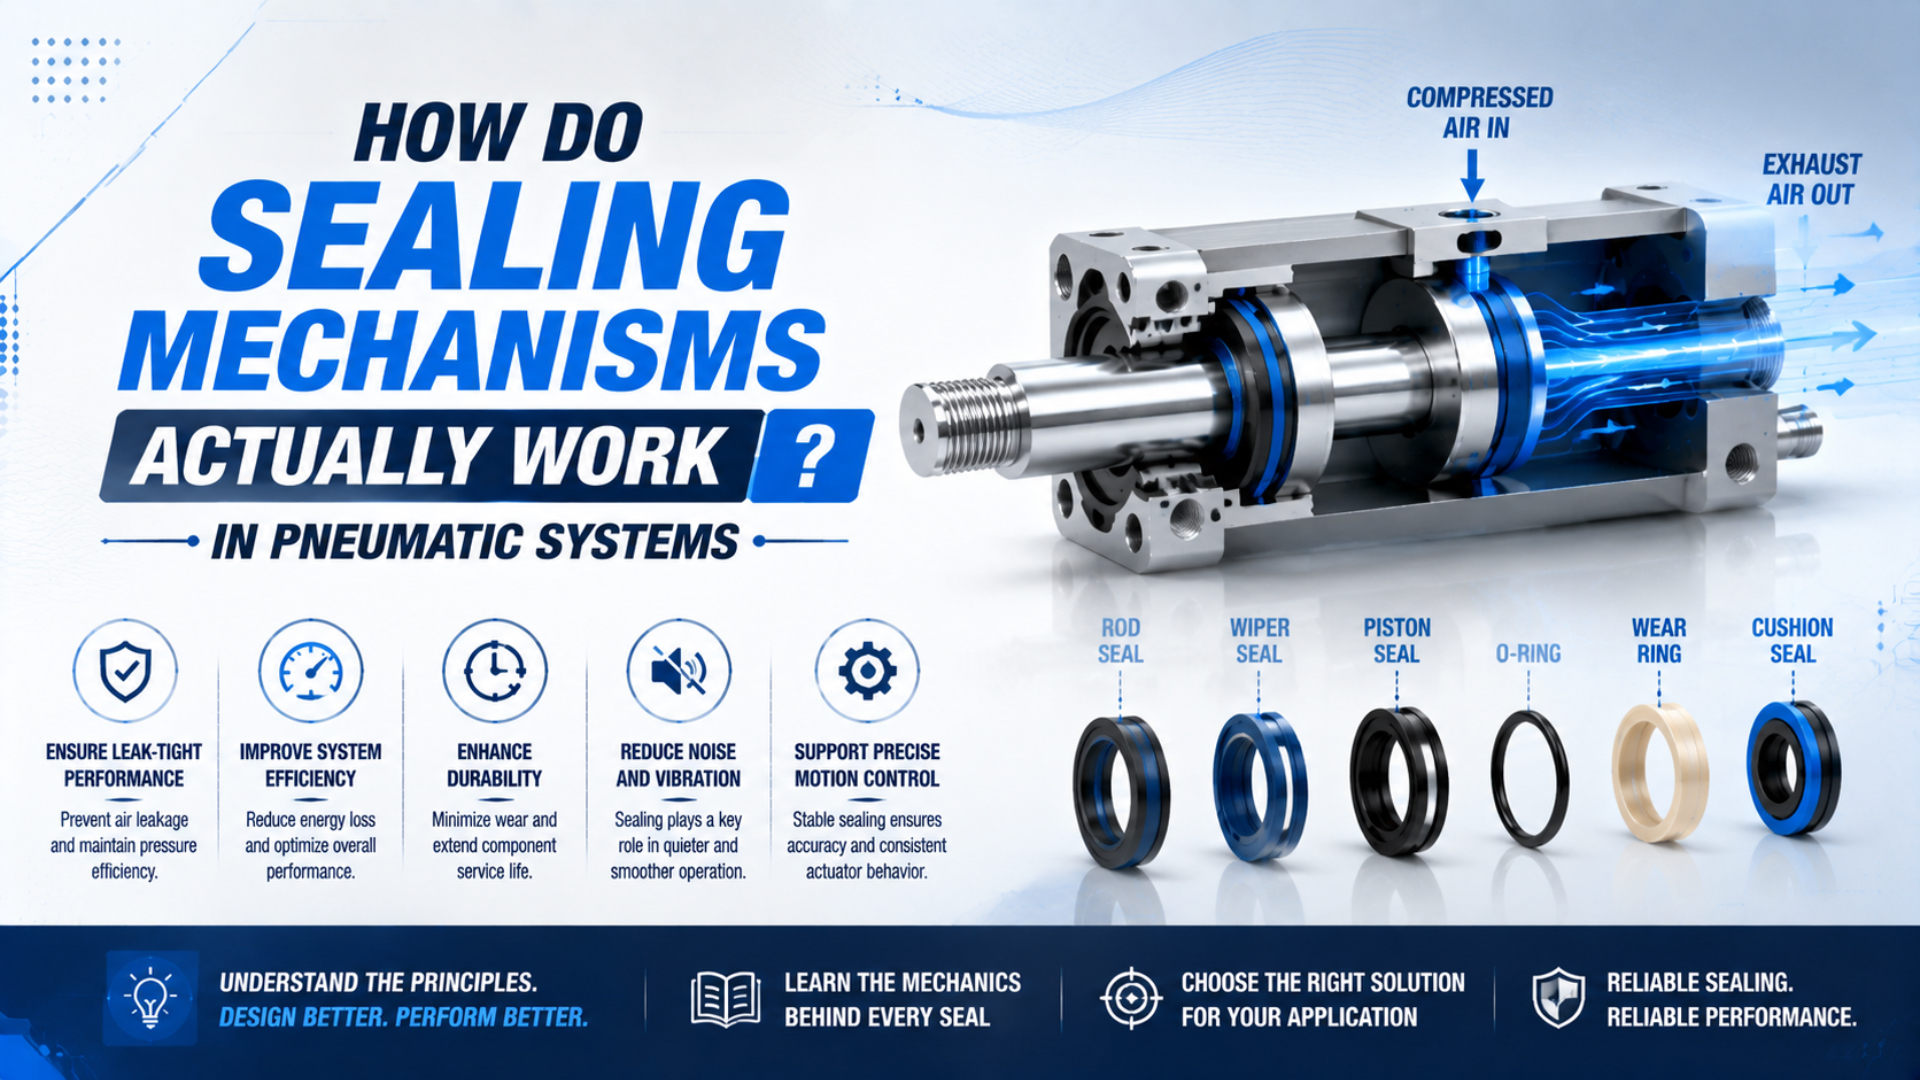
Pneumatic sealing mechanisms are controlled contact barriers along potential leakage paths. Initial squeeze closes the path before pressure builds. System pressure then energizes many O-rings and lip seals against their mating surfaces. In moving joints, the design must retain that contact while limiting friction, lubricant loss, wear, and heat.
Material name or compression percentage alone cannot select a seal. The complete sealing system includes the seal profile, compound, groove, mating surface, extrusion clearance, pressure direction, motion, lubricant, temperature, tolerances, alignment, and assembly method. Change one term and leakage or friction can change with it.
Key Takeaways
- Initial interference seals at low pressure.
- System pressure energizes many seal profiles.
- Groove dimensions and tolerances control real squeeze.
- Dynamic seals must balance leakage, friction, lubrication, and wear.
- A 2019 experiment attributed 90% of tested cylinder friction to piston seals.
How Do Pneumatic Sealing Mechanisms Create a Contact Barrier?
Under ISO 3601-2:2025, the housing is the groove or cavity plus the mating surface that confines an O-ring. That two-part definition gives the direct answer: a seal works only when the elastomer, housing, mating surface, and pressure direction create a continuous contact barrier (ISO 3601-2, 2025).
Before pressure is applied, installation interference deforms the seal enough to close the potential leak path. This is the preload. Once air pressure enters the pressure-side clearance, it acts on the exposed seal surface and pushes the seal toward the lower-pressure side. The seal deforms against the groove wall and mating surface, increasing local contact pressure. This behavior is commonly called pressure energization. It does not mean that pressure repairs an unsuitable groove, damaged surface, wrong compound, or excessive extrusion gap. The seal still needs enough initial contact for low-pressure sealing, enough free volume to deform, and enough support to resist being forced into a clearance.
Four functions define the mechanism:
| Function | What provides it? | What can defeat it? |
|---|---|---|
| Initial closure | Installed interference or a spring energizer | Too little squeeze, tolerance stack, damage |
| Pressure response | Pressure acting on the seal profile | Reversed lip, blocked pressure path, wrong orientation |
| Structural support | Groove wall, bore, rod, back-up ring | Excessive clearance, deflection, edge damage |
| Dynamic compatibility | Lubricant film, surface texture, seal geometry | Dry running, misalignment, contamination, excess preload |
Ask a more useful design question than “Which seal material is best?” Ask what closes, energizes, supports, and lubricates this exact leakage path. That wording forces the review to include the hardware and operating condition instead of treating the seal as an isolated spare part.
Static and Dynamic Sealing Paths
Published in 2025, ISO 3601-2 covers general hydraulic and pneumatic O-ring housings both with and without anti-extrusion rings. It also separates piston and rod hardware. Those distinctions matter because a static face joint, a reciprocating rod, and a moving piston expose the seal to different clearances and motion (ISO 3601-2, 2025).
Static seals join surfaces that do not move relative to each other during normal service. For example, an end-cap joint, valve body plug, port fitting, or manifold interface may use one. The main design concerns are squeeze, groove fill, pressure direction, thermal expansion, material compatibility, fastener load, surface damage, and pressure cycling.
Dynamic seals have relative motion at the sealing contact. A rod seal retains pressure while the rod reciprocates. A piston seal separates the two cylinder chambers. A wiper removes external contamination but is not automatically the primary pressure seal. Guide rings and bearings support transverse loads so the sealing lips are not asked to guide the mechanism. Dynamic sealing is a compromise. More interference can improve initial contact yet raise breakaway force and wear. Less interference can reduce friction yet weaken low-pressure sealing. The correct profile uses pressure direction and lip geometry to add contact where needed rather than relying on excessive preload everywhere.
The dynamic-versus-static cylinder seal guide compares the four main cylinder interfaces in more detail. This article stays focused on how contact, pressure energization, support, and lubrication create the sealing mechanism.
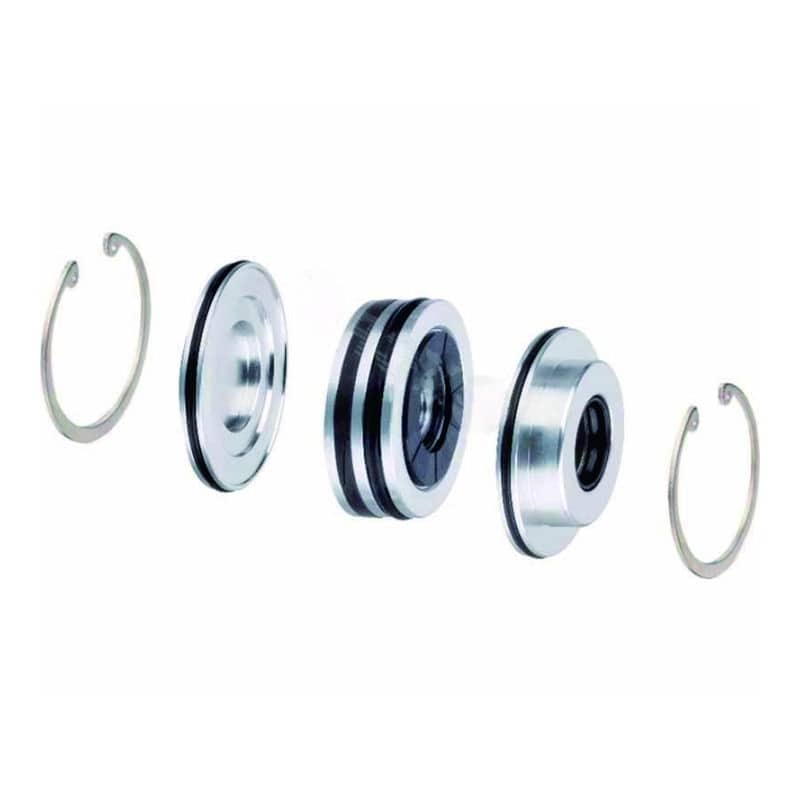
That exploded cylinder image shows why seal function should be assigned by location. Piston seals separate chambers, end-cap seals close static joints, rod seals retain air, and bearings control alignment. A visually similar ring can have a different compound, profile, direction, and job.
How Should O-Ring Squeeze and Groove Fill Be Calculated?
O-ring dimensions and housings are covered separately: ISO 3601-1:2012 specifies inside diameters, cross-sections, and tolerances, while ISO 3601-2:2025 specifies matching housings. A nominal squeeze calculation is useful, but it must be followed by a tolerance stack and the applicable gland table (ISO 3601-1, 2012; ISO 3601-2, 2025).
For a simplified radial gland, nominal squeeze can be expressed as:
Here, is nominal squeeze, is the installed O-ring cross-section, and is the effective radial gland height. The effective height must come from the actual bore, rod, groove, coatings, and tolerances. Stretch or compression of the ring can also change its installed cross-section.
Do not approve a design from the nominal value alone. Calculate the minimum and maximum squeeze using worst-case dimensional limits. Then check groove fill, pressure direction, extrusion clearance, thermal expansion, swell, assembly stretch, edge radii, and the selected compound’s supplier data. Groove fill compares installed seal volume with available gland volume. Excess unused space is not automatically safe, and a completely packed groove is not desirable. The seal needs room for dimensional tolerance, thermal expansion, fluid or lubricant swell, and pressure-driven deformation.
This is why one universal “15-30% compression” rule fails. A static face seal, reciprocating piston O-ring, rod seal, and hard thermoplastic element do not share one gland geometry or deformation model. Use the applicable housing table as the starting point, then verify the complete tolerance and environment.
ISO 3601-3:2005 separately defines quality acceptance criteria and limits for O-ring surface imperfections. Even a dimensionally correct ring can leak if flash, cuts, voids, or surface defects cross the sealing contact (ISO 3601-3, 2005).
How Do Dynamic Lip Seals Retain Air While Moving?
In a 2019 experiment, piston and rod seals were tested separately, and piston seals produced 90% of friction in the tested pneumatic cylinders. The study also found strong interaction among pressure, velocity, seal geometry, and diameter, so friction cannot be assigned from material alone (Tribology International, 2019).
Lip seals use asymmetric profiles. The pressure-facing cavity exposes part of the lip to system pressure. As pressure rises, the lip is urged toward the rod or bore and the supporting groove wall. The low-pressure side is shaped to let the lip flex without rolling or becoming unstable. During motion, the contact zone may carry a very thin lubricant film. Too little film raises adhesion, wear, and stick-slip. Too much transport can appear as external leakage or lubricant loss. Motion reversal changes film direction and contact conditions, so extension and retraction friction need not match.
The classical Stribeck curve is a useful vocabulary for boundary, mixed, and fluid-film lubrication, but it is not a universal seal-selection chart. Elastomeric contacts deform, pressure changes the contact distribution, grease can migrate, and the rod or bore reverses direction. Use component tests under the actual pressure, speed, stroke, dwell, lubricant, and surface.
The related breakaway-force guide explains how dwell and seal friction affect starting motion. The lip-profile optimization guide covers the narrower task of validating profile geometry against friction, leakage, and wear.
Why Doesn’t More Pressure or Squeeze Always Improve Sealing?
Five anti-extrusion ring types are specified by ISO 3601-4:2008 for selected O-rings and housings. Their existence shows that pressure resistance depends on supporting the seal at the clearance, not simply increasing squeeze or hardness until leakage stops (ISO 3601-4, 2008).
Pressure energization increases contact, but it also pushes the seal toward every available extrusion gap. The risk depends on differential pressure, clearance at operating load, seal hardness and modulus, temperature, material condition, pressure cycling, and whether motion repeatedly pulls damaged material across an edge. Hardware deflection belongs in the clearance calculation. For example, a nominal machining gap can grow when a tube expands, a piston tilts, a bearing wears, a groove distorts, or a side load bends the rod. The maximum working gap can therefore exceed the drawing’s room-temperature concentric value.
Back-up rings support the pressure-side clearance when the selected seal and hardware require them. Orientation matters. Pressure reversal may need support on both sides, and a solid ring may require different assembly access than a split or spiral design.
The extrusion-gap guide develops that clearance problem in detail. Spring energizers solve a different low-pressure problem; see the spring-energized seal guide before treating them as a universal retrofit.
What Controls Friction, Stick-Slip, and Seal Heating?
Experimental pneumatic-seal data published in 2019 found pressure had a greater effect on friction than velocity in its tested configurations, while geometry and diameter also changed the result. That evidence supports measuring friction at the application condition instead of assigning one coefficient to NBR, polyurethane, or PTFE (Tribology International, 2019).
Frictional power at one moving interface can be written as:
Here, is frictional power in watts, is measured friction force in newtons, and is sliding speed in metres per second. This relationship estimates the mechanical power converted at the interface. It does not directly predict seal temperature.
Temperature requires a transient thermal model or measurement. Heat divides among the seal, rod or bore, surrounding metal, lubricant, and compressed air. Reversal, stroke length, duty cycle, dwell, ambient temperature, and convection change the result. Dividing friction power only by seal mass and specific heat assumes adiabatic heating and quickly becomes unrealistic. Stick-slip occurs when the force needed to start or restart motion differs from the force during sliding and the pneumatic/control system can store enough energy to repeat the cycle. Seal friction is one contributor. Valve dead band, air compliance, guide friction, misalignment, low speed, lubricant condition, and controller tuning can also participate.
Practical mitigation starts with evidence:
- Record both chamber pressures, position, speed, temperature, dwell, and motion direction.
- Measure breakaway and running force instead of assuming a coefficient.
- Inspect the rod or bore, seal lip, lubricant distribution, guide, and alignment.
- Compare the measured duty with the seal supplier’s approved pressure-speed-temperature envelope.
- Retest after one controlled change so friction, leakage, and wear remain traceable.
How Do Surface Finish and Alignment Affect Leakage?
Trelleborg’s pneumatic seal guide compares two profiles with similar height-based roughness but material ratios of 70% and 15%, illustrating why one Ra or Rz value cannot describe the sealing surface. The guide also prohibits scores, scratches, pores, and spiral machining marks on dynamic surfaces (Trelleborg Pneumatic Seals, accessed 2026).
A dynamic surface must retain an appropriate film without cutting the lip or creating a directional pumping path. Average roughness alone cannot show isolated scratches, open valleys, plateau structure, lead, waviness, or damage at ports and threads. Specify the surface parameters, measurement method, direction, sampling conditions, coating, hardness, and defect limits required by the chosen seal supplier. Alignment is equally important. A side-loaded rod shifts the seal contact pressure around the circumference. One sector runs heavily loaded while the opposite sector loses contact. The same load can also wear the bearing, enlarge the working extrusion gap, and drag contamination beneath the lip.
Guide rings and rod bearings should carry transverse reactions. The rod-bearing failure guide explains that load path, while the surface-finish guide separates Ra, Rz, profile shape, and inspection limits.
In our experience, mapping a damaged sector back to its port, edge, bearing, and pressure direction is more useful than changing compound first. That simple location check often separates an installation cut from circumferential wear, extrusion at one clearance, or one-sided contact caused by misalignment.
Installation damage often looks like a material failure. Protect lips from sharp threads and ports, deburr edges, use approved assembly tools and lubricants, keep components clean, and prevent twisting. Inspect the seal before closing the assembly; a cut created during installation can leak immediately regardless of compound quality.
Failure Modes Need Different Evidence
Compression-set testing under ISO 815-1:2019 normally uses 25% constant strain below 80 IRHD, then 15% or 10% for harder ranges. The result depends on compression time, temperature, and recovery conditions, so it is not a universal service-life percentage (ISO 815-1, 2019).
Match the observed damage to its likely mechanism:
| Observation | Likely mechanisms | Evidence to collect |
|---|---|---|
| Clean cut or missing lip section | Assembly edge, port crossing, hard particle | Damage location, edge condition, assembly route |
| Feathered or rolled edge | Excess friction, twist, poor support, reversal | Motion direction, lubrication, lip orientation |
| Extruded or nibbled material | Working clearance, pressure cycling, softening | Maximum gap, pressure history, temperature |
| Flat, unrecovered cross-section | Compression set, thermal or chemical ageing | Compound, time, temperature, recovery test |
| Polished band on one side | Misalignment, side load, bearing wear | Concentricity, guide reaction, rod deflection |
| Blisters, swelling, cracking | Medium incompatibility, decompression, ageing | Fluid exposure, pressure release, material change |
| Leakage with little visible damage | Surface path, low preload, tolerance, valve bypass | Dimensions, pressure-decay isolation, surface scan |
A leak at the actuator port does not prove the piston seal is leaking. Valve overlap, tube fittings, end-cap joints, rod seals, external tubing, and test connections can create the same pressure loss. Isolate boundaries safely and measure each path before replacing parts. The internal-leakage diagnostic guide separates piston bypass from valve and external leakage. When a sealed volume can be isolated safely, the Pressure Decay Leak Rate Calculator can organize volume, pressure, time, and temperature inputs. It does not identify the leaking component by itself.
Seal Selection and Validation Checklist
Material specifications in ISO 3601-5:2015 cover selected industrial elastomers, but the standard says required physical properties and test methods should be agreed among the equipment manufacturer, user, and seal supplier. A polymer family name alone is therefore not a complete seal specification (ISO 3601-5, 2015).
Provide these inputs before selecting or replacing a seal:
- static, piston, rod, rotary, wiper, or cushioning function;
- pressure range, pressure direction, reversals, spikes, and decompression rate;
- rod or bore diameter, groove dimensions, tolerances, and maximum working clearance;
- stroke, speed range, acceleration, cycles, dwell, and duty cycle;
- ambient and interface temperature range;
- air quality, lubricant, cleaning agent, process medium, and external contamination;
- rod or bore material, coating, hardness, surface specification, lead, and defect limits;
- side load, guide arrangement, concentricity, runout, and assembly method;
- permitted external and internal leakage;
- breakaway force, running friction, temperature, wear, and endurance acceptance limits;
- traceability and change notification for compound, profile, tooling, and lubricant.
Validate the assembled component, not just a material coupon. Record initial leakage and friction, condition the seal through the defined cycles, repeat the measurements hot and cold where applicable, inspect the contact surfaces, and document recovery after dwell. If temperature is important, place sensors near the real interface and define the acquisition rate. An acceptance test should preserve the variables that energize and support the seal. Pressure without piston position omits chamber geometry. Leakage without temperature omits gas-density and thermal effects. Friction without direction and dwell hides hysteresis. A compact test record is more valuable than a generic claim of “long seal life.”
Pneumatic Sealing Mechanism FAQs: What Should Engineers Ask?
Across its five parts, the ISO 3601 family separates O-ring dimensions, housings, surface quality, back-up rings, and industrial material specifications. That structure answers a frequent design mistake: no single squeeze percentage, hardness, compound, or surface number can specify the complete pneumatic sealing mechanism (ISO sealing standards catalogue, accessed 2026).
What is the ideal O-ring compression ratio for a pneumatic cylinder?
There is no universal value. Start with the applicable ISO 3601-2 or seal-supplier housing table for the exact static, piston, or rod arrangement. Calculate minimum and maximum squeeze from actual tolerances, then check groove fill, stretch, temperature, swell, pressure, extrusion clearance, motion, and compound data.
Does higher air pressure make every pneumatic seal work better?
No. Pressure can energize a correctly oriented O-ring or lip, but it also increases contact load and drives material toward extrusion gaps. A damaged surface, reversed lip, excessive clearance, blocked pressure path, incompatible compound, or weak bearing support will not be corrected reliably by raising supply pressure.
Can the Stribeck curve predict pneumatic seal friction?
It provides useful lubrication-regime vocabulary, not a universal friction value. Pneumatic seal friction also changes with pressure, lip geometry, diameter, grease distribution, surface, temperature, stroke, dwell, reversal, and material viscoelasticity. Use supplier test data and component measurements that reproduce the intended operating condition.
How can I tell whether leakage comes from the piston seal or the valve?
Isolate the cylinder, valve, tubing, and test connections as separate boundaries using an approved safe procedure. Record both chamber pressures, piston position, temperature, volume, and time. Pressure decay alone confirms loss from the tested volume; it does not identify which component or interface caused that loss.
Why does a new pneumatic seal fail immediately after assembly?
Immediate failure usually points to installation damage, wrong orientation, incorrect size, a sharp port or thread, contamination, twisted geometry, dry assembly, or a hardware dimension outside tolerance. Inspect the damage location and assembly path before changing material. A higher-grade compound cannot compensate for a cut sealing lip.
Sources and Technical References
- ISO 3601-1:2012, O-ring dimensions, tolerances and designation codes, accessed 2026-07-27.
- ISO 3601-2:2025, housing dimensions for general applications, accessed 2026-07-27.
- ISO 3601-3:2005, quality acceptance criteria, accessed 2026-07-27.
- ISO 3601-4:2008, anti-extrusion rings, accessed 2026-07-27.
- ISO 3601-5:2015, industrial elastomer material specifications, accessed 2026-07-27.
- ISO 815-1:2019, compression set at ambient or elevated temperatures, accessed 2026-07-27.
- Parker O-Ring Handbook, accessed 2026-07-27.
- Trelleborg Pneumatic Seals catalogue, accessed 2026-07-27.
- Experimental study of friction in pneumatic seals, Tribology International, 2019.
- Failure and Damage of Reciprocating Lip Seals for Pneumatic Cylinders in Dry Conditions, Lubricants, 2024.